What's inside this article:
- Basic information
- Open the YMAL list
- Add titles and save your YMAL
- Set the layout
- Add content
- Assign categories
- Publish your YMAL
- Optimize your YMAL for reader engagement
Basic information
This article explains how to build a new 'You Might Also Like' (YMAL) in Pangea CMS.
What is a YMAL?
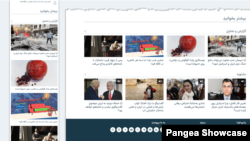
A YMAL is a collection of recommended content that appears below the main content on content pages. An engaging and well-organized YMAL can increase the time spent on your site by encouraging readers to explore other pages.
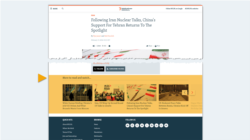
Your site can have one YMAL that appears on all content pages or multiple YMALs that are assigned to different categories.
How it works
YMAL offers a semi-automated approach for sharing links on content pages:
- What's manual: A web editor creates each YMAL in Pangea CMS. You select the layout, content, and assign the YMAL to one or more categories.
- What's automated: Each content page displays the YMAL that is assigned to its primary category.
NOTE: Displaying YMAL is optional. If the primary category for a content page does not have an assigned YMAL, the page does not display a YMAL.
Open the YMAL list
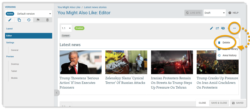
In Pangea CMS, go to Build > You Might Also Like to see a list of all the YMALs for your site.
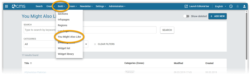
To create a new YMAL, click Add new.

This article covers the following stages:
Add titles and save your YMAL
On the New You Might Also Like dialog, complete the following settings:
- Title: The YMAL title in your local website language. This title does not appear on the public site
- English title: The YMAL title in English. English titles are helpful for Pangea users who do not understand your local language. This title does not appear on the public site
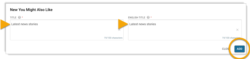
After you add both titles, click Add. After you perform this step:
- The edit page for your new YMAL opens.
- Your new YMAL is saved in Pangea CMS and appears on the YMAL list.
Set the layout
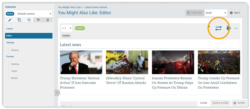
Before you add content, set the layout for your new YMAL. To make changes to the layout, click Layout in the left panel.
Layout blocks provide the underlying structure for your YMAL. Each block:
- Runs horizontally across the full page width
- Contains one or more areas where you can place Widgets are interactive page elements that display and promote your content for website visitors. Pangea CMS offers various widget types and layouts that serve different purposes. Learn more.
- Displays one widget per area
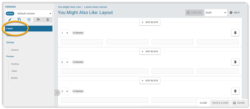
Default layout blocks
By default, a new YMAL in Pangea CMS includes the following layout blocks:
- 4x 1 column
- 2 column and 2x 1 column
- 2x 2 column
You do not need to use the default layout blocks. You can add, delete, and move blocks to create a custom layout that fits your exact needs.
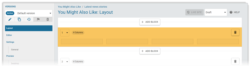
To delete an empty layout block, click the Delete button above the block.

NOTE: You can only delete empty layout blocks. If the block contains widgets, first go to the Editor subpage and delete the widgets.
Empty layout blocks do not impact the look of the published YMAL. However, deleting them can help other Pangea users understand the intended layout.
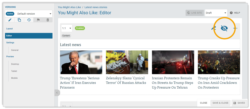
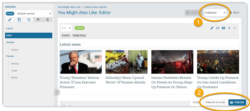
To add a new layout block:
- Scroll to the position where you want to add the block. Click + Add block.
- On the Add block dialog, select the block you want to add.
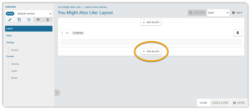
The new block is added to the section. To add more blocks, repeat the steps above. To start adding content, open the Editor subpage.
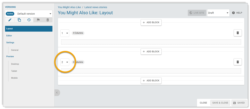
To move a layout block, use the selector above it. For example, if you select 2, the block is positioned second.
For YMAL, we suggest using a simple layout with no more than 2-3 rows of content on desktop. For detailed guidelines and example layouts, see the following article:
Add content
After setting up the layout, you are ready to start adding content. Content is added to YMALs using Widgets are interactive page element that display and promote your content for website visitors. Pangea CMS offers various widget types and layouts that serve different purposes. Learn more..
To start adding widgets to your YMAL, select the Editor tab.
Widget types for YMAL
All Pangea widget types are supported on YMALs. The following widget types are especially useful for YMALs:
- Content widget: Share one or more links to content pages.
- Trends widget: Display current trending items from the category.
- Multimedia widget: Share an on-demand audio / video item.
- Podcast widget: Share the latest episode from a podcast.
TIP: Use the 'Media slider' layout to share more links without increasing the vertical length of the page. See Using the 'Media slider' widget layout for more details.
Create a new widget
You can create a new widget to display in your YMAL. Follow these steps:
- Click the empty area where you want to display the widget.

- On the Add widget dialog, make sure the New widget tab is selected.

- Select the type of widget you want to create.

The edit page for the new widget opens. For detailed information about how to set up a new widget, see the relevant article below, depending on the type of widget:
Content | Factcheck | HTML | Live stream | Manual stream | Multimedia | Podcast | Poll | Subscription | Trends
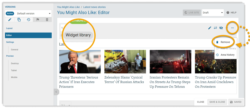
Reuse a library widget
Alternatively, you can reuse an existing widget from the The widget library is a collection of ready-to-use widgets. Widgets saved in the widget library are known as library widgets. One library widget might be used in multiple places across your website. Learn more.. Follow these steps:
- Click the empty area where you want to display the widget.
- On the Add widget dialog, select the Library widget tab.
- Search for and select the widget you want to use.
The library widget appears in your selected area.
Manage widgets
On the Editor subpage, various options are available for managing your previously added widgets:
You can move a widget from one area to another. If the target area already contains another widget, the two widgets will switch places.
To move a widget, select the Move button above it.
Select the target area where you want to move the widget. Supported areas for this widget are marked green. Most widgets can move to any area, with the following exceptions:
- Podcast widgets are only supported in one-column areas.
- Content widgets with special layouts (Media Slider or Feature) can only be used in their corresponding layout block.
The widget is moved to the area you select.
You can replace an existing widget with another widget. The following rules apply:
- If the replaced widget is independent, it is permanently deleted.
- If the replaced widget is from the widget library, it is only removed from the current YMAL.
To replace a widget, select the Replace button above it. You can replace it by creating a new widget, or by finding and selecting an existing library widget.

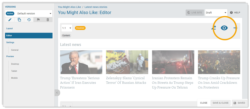
You can hide a widget to prevent it from appearing on the published YMAL, while keeping it visible in Pangea CMS. You can enable the widget again at any time.
To hide a widget, click Disable above it.
To reveal a hidden widget, click Enable.
Select Menu (...) > Delete to permanently delete an independent widget.
Select Menu (...) > Remove to remove a library widget from the current YMAL. The widget remains saved in the widget library and stays visible on other pages. Library widgets are marked with the Widget library badge.
Assign categories
You can assign a YMAL to one or more categories. It will appear on all content pages where one of its assigned categories is set as primary.
To assign categories, go to Settings > General > Categories.

Rules for category selection
- You can select any category type: content, TV, or radio.
- Each category can have one assigned YMAL. If you select a category that already has a YMAL assigned, your new YMAL will replace the existing one.
NOTE: Without an assigned category, the YMAL will not appear anywhere on the public site.
Publish your YMAL
When your YMAL is prepared, follow these steps to publish it:
- Select Published in the status selector.
- Click Publish or Publish & close.
The YMAL is now published. If it has at least one assigned category, it appears on the public site.
Due to caching, changes may take up to 5 minutes to appear on content pages. For details, see the following article:
Optimize your YMAL for reader engagement
For tips on how to optimize your YMALs with example layouts, see the following article:

