What's inside this article:
- Basic information
- Create a new widget
- Add content
- Add a header / footer
- Add a custom widget name
- Preview the widget
- Set the status and save the widget
Basic information
An HTML widget is like a blank canvas, which lets you display custom content on pages. Despite the name, you don't need to use HTML code to create an HTML widget. If preferred, you can conveniently add the widget content using our WYSIWYG (What You See Is What You Get) rich text editor.
HTML widgets are commonly used to display:
- Approved external media items (such as YouTube videos and Datawrapper visualizations).
- Content (such as Videos and Snippets) created inside Pangea CMS by your own site.
- Custom text content, such as information and instructions.
This article explains how to create a new HTML widget from Pangea CMS.
Create a new widget
The following segments might include an HTML widget:
- Sections (including your homepage)
- Infopages
- Landings
- You Might Also Like (YMAL)
To create a new HTML widget:
- Go to Build in the primary navigation. Select a segment type, depending where you want to display the widget (Sections, Infopages, Landings, or YMAL).

- Select the name of the specific segment where you want to display the widget.

- Ensure Editor is selected.
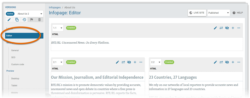
- Select the empty area where you want to add the widget.

- Select New widget > HTML to create a new HTML widget.

The widget edit page opens in the same tab.
NOTE: You can also create a new HTML widget from the Widget library.
The chapters below describe each stage of the creation process:
- Add content
- Add a header / footer
- Add a custom widget name
- Preview the widget
- Set the status and save the widget
Add content
On the Content subpage, you can add the widget content using our WYSIWYG (What You See Is What You Get) rich text editor.
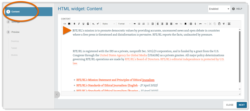
Some useful options for HTML widgets are described below:
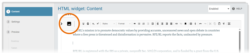
Maximize the text editor
Hit the Maximize button to open the text editor in fullscreen. This option is especially useful if you are editing the widget on a mobile device.

Hit the Maximize button again to return to the normal view.
Add embedded content
You might use an HTML widget to display the following types of embedded content:
- Images: Images from the Pangea The Graphic Database (GDB) is the centralized image library in Pangea CMS. All images on Pangea websites come from the GDB. In Pangea CMS, Pangea users can browse the existing GDB and upload new images. Learn more. (GDB) or from supported external wire agencies
- External media: Supported external media items (including items from YouTube, Facebook, Instagram, Telegram and many more popular platforms).
- Direct embeds: Content items (such as videos and galleries) that are interactive on the page.
To get started, position the cursor where you want to insert the embedded item. Then, hit the Insert embedded content button.
For detailed instructions, see the following articles:
Add text
You might use an HTML widget to display custom text (such as information or instructions). The following options are available:
- Enter text manually.
- Paste text from a third-party word processor (such as Microsoft Word).
The text editor includes many useful options for formatting your text. For details, see the following article:
Switch to the HTML editor
You can switch to the HTML editor to add content using HTML code. To get started, hit the HTML editor button.
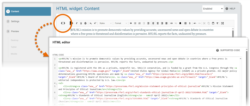
For information about supported HTML tags, see the following article:
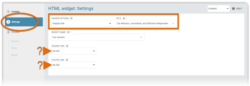
Add a header / footer
An HTML widget might include one or both of the following elements:

- (A): Header: Displayed above the widget. The header might be text-only, or it might function as a link to another page.
- (B): Footer: Displayed below the widget. The footer always functions as a link to another page.
On the Settings subpage, optionally add a header and / or a footer.
The steps for adding the header / footer are the same for every widget. For detailed information, see the following article:
Add a custom widget name
Via Settings > Widget name, optionally customize the default widget name.

The widget name is visible only in Pangea CMS (not on the public site). We suggest providing a descriptive name if your site uses the Widget list tool in Pangea CMS to manage widgets.
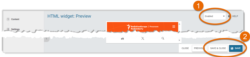
Preview the widget
On the Preview subpage, check how the HTML widget will look when it is displayed on the public site. Select Desktop, Tablet, or Mobile to preview the widget on devices with different screen sizes.

Set the status and save the widget
Before saving the HTML widget, select your preferred status using the drop-down menu in the top-right corner:
- Enabled: After you save the widget, it will be displayed on the public site (if it is included on a published page).
- Disabled: After you save the widget, it will not be displayed on the public site. However, it will be available for further editing in Pangea CMS.
Select Save or Save & close to save the widget.