What's inside this article:
- Basic information
- Work with internal images
- Work with external images
- Crop or keep aspect ratio
- Create the caption and alt text
- Warn readers about a sensitive image
- Change the size and position of the image
- Change what happens on click
- Insert and edit your image
Basic information
This article explains how to embed an image into the body of an article.
NOTE: If you want to embed an image that is saved on your device, you first need to upload the image to Pangea. For instructions, see Upload images.
Get started
Follow these steps via Editor on the article edit page:
- Position the cursor where you want to insert the image.
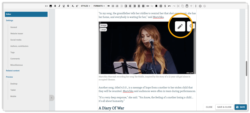
- Hit the Insert embedded content button.
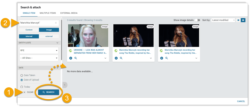
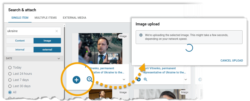
On Search & attach, ensure the Image tab is selected. You can choose from the following:
- Internal: Images from the Pangea The Graphic Database (GDB) is the centralized image library in Pangea CMS. All images on Pangea websites come from the GDB. From Pangea CMS, users can browse the existing images or upload new ones. Learn more. (GDB). These images have already been uploaded to Pangea by Pangea users.
- External: Images from external wire agencies (Reuters and AFP). You can search and select the image you want to use.

Find more details in the sections below:
Work with internal images
On Search & attach, you can use search to find images with a particular focus. Follow these basic steps:
- Optionally hit Clear to remove any existing filters.
- Enter keywords and adjust the filters to match your needs.
- Hit Search.
The results refresh to show just the images that meet your criteria.
For detailed information on how to run an image search in Pangea CMS, see the following article:
Select + Attach next to the image you want to embed.
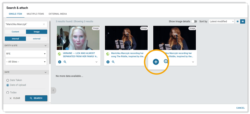
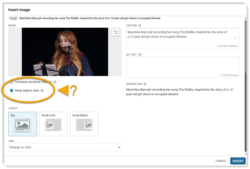
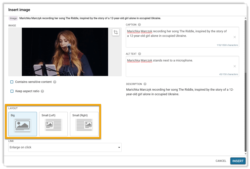
After selecting an image, you see the Insert image dialog. Here, you can define custom settings for the individual embed.
Work with external images
On Search & attach, hit + Attach next to the image you want to embed.
After you select an image, Pangea automatically starts uploading your image to the Pangea Graphic Database (GDB)
Once the upload is complete, you see the Insert image dialog. Here, you can define custom settings for the individual embed.
NOTE: Once an external image has been uploaded to the GDB, it will be saved and available in Pangea CMS as an internal image.
Crop or keep aspect ratio
By default, all embedded images are displayed in the 16:9 aspect ratio. If your image doesn't fit this aspect ratio, Pangea automatically crops it.
If you want to display the full image without cropping, tick Keep aspect ratio. This option is helpful if you want to display the entire image without cropping.
For detailed information about aspect ratio, see our Avoid unwanted cropping article.
Manual cropping
NOTE: If Keep aspect ratio is ticked, manual cropping may not work. This is because manual cropping maintains the standard 16:9 ratio. Pangea does not support cropping for non-standard aspect ratios.
If Keep aspect ratio is not ticked, Pangea may automatically crop your image. To check the automatic cropping, hit the Crop image button in the image preview. If the automatic cropping is not optimal, you can manually crop the image.
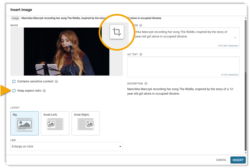
On the Crop image dialog, click and drag the box to change which part of the image your readers will see. Manual cropping maintains the standard 16:9 ratio.
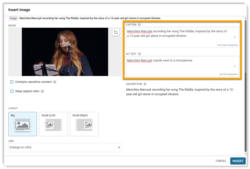
Create the caption and alt text
The caption displays below the image on the public site. An effective caption provides context for the image and explains its relevance to the story.
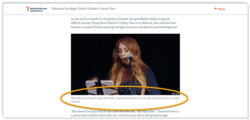
Under Caption, write a custom caption for readers in your local language. The default caption (normally in English) is prefilled. Your custom caption will only be used on the current article.
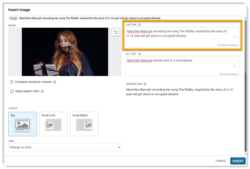
Alt text
Under Alt text, optionally provide alt text for the image in your local language.
If you do not provide alt text, the image caption will be used as the alt text. If you do not provide a caption or alt text, the image will have no alt text.
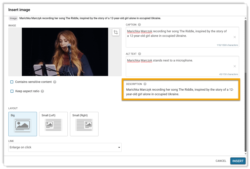
Description
The internal description for the image is provided to help you formulate the caption and alt text. This text doesn't appear anywhere on the public site.
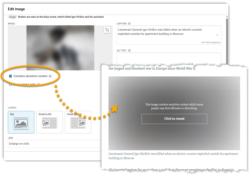
Warn readers about a sensitive image
Consider adding a sensitive content warning if the image shows scenes that may be upsetting or offensive for certain audiences. For example, you might add a warning for images showing:
- Violence or the aftermath of violent incidents
- Abuse or cruelty
- Disturbing or traumatic situations
- Sensitive cultural or religious content
To add a warning, tick Contains sensitive content. When this option is ticked, the image is hidden by default on the published article (covered with a short disclaimer). Readers can choose to manually reveal the image.
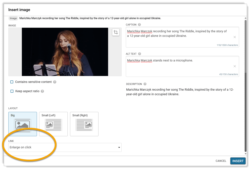
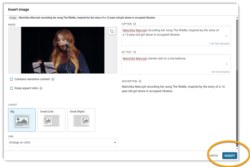
Change the size and position of the image
Under Layout, you can change the size and position of the image. The following options are available:
- Big: The image occupies the full content width.
- Small (Left): The image appears in a smaller size on the left side of the content.
- Small (Right): The image appears in a smaller size on the right side of the content.
If you are creating a Feature story, the following additional options are available:
- Full-width: The image occupies the full page width.
- Jumbo: The image is slightly wider than the content.
For information about Feature stories, see our Create a Feature story article.
Change what happens on click
Under Link, you can change what happens when a reader taps / clicks the image. The following options are available:
- No action: Nothing happens when a reader taps / clicks the image.
- Enlarge on click: The image opens in fullscreen on click / tap. The reader can browse through all images on the page in a lightbox.
- Link to URL: The image functions as a link to another webpage. If you select this option, you need to define the target URL and where the link will open.
Insert and edit your image
After configuring the settings, select Insert.
You see a placeholder representing your inserted image on the Editor. If you need to update the image settings (including the image caption), hit the Edit button inside the placeholder.