What's inside this article:
- Basic information
- Access Image upload
- Select files for upload
- Add the metadata
- Use bulk edit
- Save your images
Basic information
This article explains how to upload new images to the Pangea GDB (Graphic Database). You can upload one image or a batch of multiple images.
Once an image has been successfully uploaded and saved, it is available to use in Pangea CMS. The Pangea GDB is a shared resource, which means that other Pangea CMS users (including users from other sites) might also see and use the image.
Find more details below:
This article explains how to upload images from inside Pangea CMS. You can also upload images to Pangea CMS from the PangeaGO mobile app. PangeaGO is specially designed for field journalists who need to quickly upload media files from a mobile device. For detailed information, see the alternative article below:
Access Image upload
To get started, to to Create > Multimedia > Image. The Image upload page opens in the same tab.
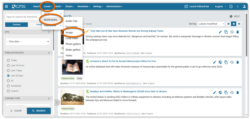
Alternatively, go to Upload > Image on the edit page for a story. When you use this option, the Image upload page opens in a new tab, so you will not lose any unsaved work.

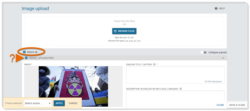
Select files for upload
On the Image upload page, you can upload a single image or a batch of multiple images. Select the image file(s) you want to upload using one of the methods below:
- Select all the files you want to upload, then drag and drop them into the box.
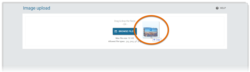
- Hit Browse files, navigate to the location where the files are saved, select all the files you want to upload, then hit Open.

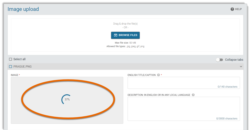
Pangea immediately starts to upload your image(s). The upload progress for each image is displayed in the Image box. While the upload is in progress, you can start adding metadata. For details, go to the following chapter in this article:
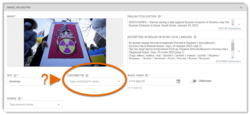
Add the metadata
You might add the following metadata for each image:
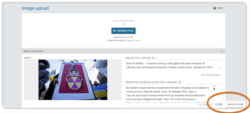
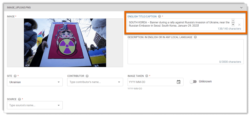
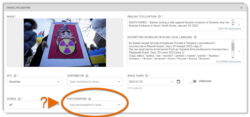
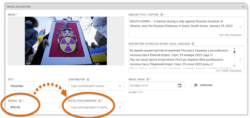
For every image, it is required to add an English Title / Caption. To help make the text understandable for other Pangea CMS users, please use English. If you need to provide information in other languages, use the Description field.
The English Title / Caption serves the following purposes:
- Title: The internal title for the image. The title is searchable, helping other Pangea CMS users to find and identify the image.
- Caption: The default caption for the image. The caption is displayed below the image on the public site. The default caption can act as a guide to help editors craft unique captions in the local website language. If an editor forgets to replace the default caption, it might be displayed on the public site.
To provide all the relevant information, use the following structure when creating the default caption:
- Country - Who, What, Where, When
For each image, include only the details that are known and relevant. It is not necessary to use full sentences. An example is provided below:
- Pakistan - A boy plays at the edge of Naguman River on the outskirts of Peshawar, Pakistan August 1, 2023
You can optionally add a Description for each image. The Description can be in any language. You might write several versions of the same text in different languages. The text will only be visible internally in Pangea CMS.
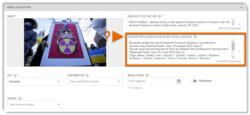
The Description serves the following purposes:
- The text is searchable, helping other Pangea CMS users to find and identify the image.
- The text can act as a guide to help editors work with the image.
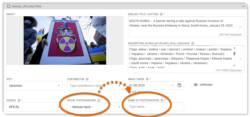
For every image, one Site must be selected. This is normally the site that uploaded the image. The current site you are on is selected by default.
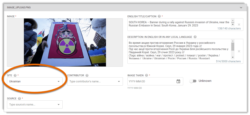
For every image, it is required to select a Source. The Source is the organization, agency, or entity that owns permission to use the image.
Contact Pangea Customer Care if the Source you need is not on the list. The list of approved Sources is managed by the Pangea Digital team.
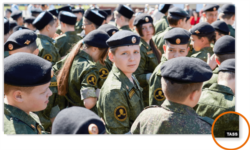
To avoid copyright issues, the Source is displayed with the image on the public site (as shown below).
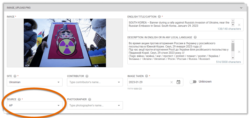
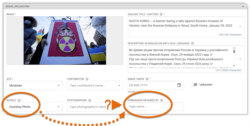
You optionally add a Photographer for each image. For a photo, this is normally the person who physically took the photo.
NOTE: If RFE/RL is the Source, you see RFE/RL Photographer instead of Photographer. RFE/RL Photographer is a required field.
If the Photographer you need is not on the list, two options are available:
- Contact Pangea Customer Care and request that the name is added to the approved list of Photographers. We recommend this approach if the Photographer will be needed for more photos in the future.
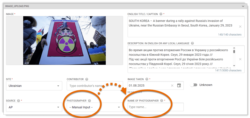
- Select Manual input. Under Name of photographer, you can then enter any name. We only recommend this approach for one-off collaborations, where the Photographer will not be needed for more photos in the future.
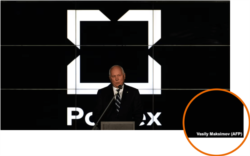
To avoid copyright issues, the Photographer is displayed with the image on the public site (as shown below). The name of the Photographer appears first on the image, with the Source afterwards in brackets.
If RFE/RL is selected as the Source, you see RFE/RL Photographer instead of Photographer. RFE/RL Photographer is a required field.
If the RFE/RL Photographer you need is not on the list, two options are available:
- Contact Pangea Customer Care and request that the name is added to the approved list of RFE/RL Photographers. We recommend this approach if the Photographer will be needed for more photos in the future.
- Select Manual input. Under Name of photographer, you can then enter any name. We only recommend this approach for one-off collaborations, where the Photographer will not be needed for more photos in the future.
An RFE/RL Photographer is displayed with the image on the public site, the same as a standard Photographer.
If Courtesy Photo is selected as the Source, the Permission obtained by field is available.
In this field, you might provide:
- The name of the contact person or organization that gave permission to use the photo.
- The name of the person who obtained permission to use the photo.
- Any conditions that limit how the photo can be used.
- A claim number (if possible).
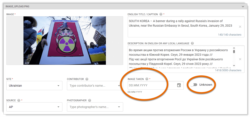
Under Image taken, add the date when the image was taken or created. If you are not sure, enable the Unknown slider. You must perform one of these actions for each image.
You can optionally add a Contributor for each image. The name of the Contributor is shared internally with RFE/RL payroll and is not displayed anywhere on the public site. This option is useful if the photographer or image creator needs to remain anonymous.
Use bulk edit
If you are uploading multiple images, you can apply the same metadata for more than one image. This saves time, as you do not need to add the same metadata separately for each image.
To get started, follow either step below:
- To edit every image in the batch, tick Select all.
- To edit just some of the images, tick individual images.
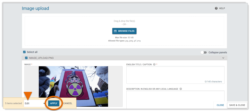
After selecting the images you want to edit:
- In the Select action... selector, select Edit. Then, hit Apply.
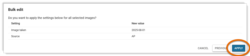
- Add the metadata that will be applied for all selected images. Then, hit Next.

- You see a summary of the edited fields. Hit Apply to confirm the action.
Your metadata is now applied for all selected images. You can add any additional metadata for each image individually.
Save your images
Hit Save & close to complete the upload process. After you perform this action, the image(s) will be saved in Pangea CMS and available for use.
If you hit Close, the upload process will be canceled and the images will be discarded along with all the added metadata.