
What's inside this article:
- Basic information
- Complete general settings
- Select a main visual
- Add a main visual
- Add the main content
- Insert embedded content
- Preview the page
- Request editorial review or publish
Basic information
This article explains how to create a feature story page in Pangea CMS.
What is a feature story?
Feature story is a type of text content page. These pages typically combine compelling narratives with high-quality visual content (such as photos, videos, and infographics) to create immersive, long-read experiences. This format works best for evergreen stories that will remain relevant over time, for example:
- Investigations
- Human-interest stories
- In-depth topic explorations
Get started
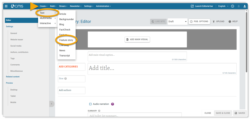
To create a new feature story, go to Create > Text > Feature story. The edit page for your new story opens in the same tab.
Complete general settings
When creating a feature story, you should complete the following settings:
- Title (required)
- Categories (required)
- Introduction (recommended)
- Authors (recommended)
- URL slug (recommended)
For detailed information about these settings, see our article creation guide.
The remaining sections in this article focus on guidance that is unique to feature stories.
Select a main visual
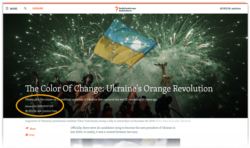
Every feature story needs a main visual. The main visual appears at the top of the page and occupies the full page width.

You can use the following content types as the main visual for a feature story:
- Image: a horizontal image.
- Loop video: a short video that autoplays on repeat with no sound.
Because of its prominence on the page, the main visual for every feature story needs careful selection.
Main visual guidelines
- Select a high-quality visual to prevent pixelation and distortion (at least 1920 x 1080 pixels).
- To avoid losing important parts of your image, select an image with the 16:9 aspect ratio. If you use an image with a different aspect ratio, Pangea will crop it to 16:9.
- Select visually striking content with strong composition.
For detailed information about aspect ratio, see our aspect ratio guide.
Add a main visual
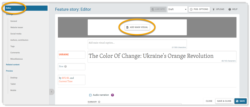
To add a main visual:
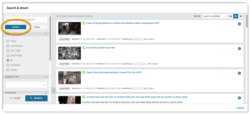
- Go to Editor > Add main visual.
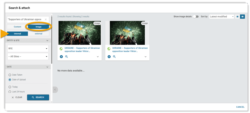
- On the Search & attach dialog, find and select the item you want to use.
Find detailed instructions below:
To search images, select the Image tab. The following options are available:
- Internal: Images from the Pangea The Graphic Database (GDB) is the centralized image library in Pangea CMS. All images on Pangea websites come from the GDB. In Pangea CMS, Pangea users can browse the existing GDB and upload new images. Learn more. (GDB). These images have already been uploaded to Pangea by Pangea users.
- External: Images from external wire agencies (Reuters and AFP). You can search and select the image you want to use.
For detailed information on how to search for images in Pangea, see our image search guide.
Manual cropping
To manually crop the image, click the Crop image button. Click and drag the box to reposition the crop area. Manual cropping maintains the standard 16:9 ratio.
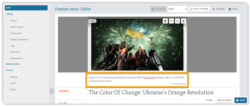
Main visual caption
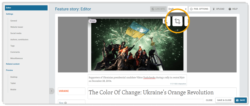
In the box below the main visual, write a caption in your local language. The caption will appear below the visual on the public site. An effective caption provides context for the visual and explains its relevance to the story.
You can click the Image detail button to view the internal image description and metadata. We provide this data to help you formulate the caption.
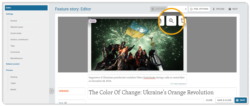
Image upload
To use an image that is saved on your device, first upload the image to Pangea. For instructions on how to upload images, see our image upload guide.
To search loop videos, select the Content tab. For detailed information on how to search for content in Pangea, see our content search guide.
Main visual caption
In the box below the main visual, write a caption in your local language. The caption will appear below the visual on the public site. An effective caption provides context for the visual and explains its relevance to the story.
Loop video upload
Pangea can automatically convert a standard video file into a loop video during upload. For detailed information on how to upload a video file for use as a loop video, see our loop video guide.
You will not be able to save the feature story without adding a main visual.
Add the main content
To start adding content, click inside the main box on the Editor subpage. While this box is active, the toolbar is available. If you click elsewhere on the page, the toolbar disappears.
For adding text, two options are available:
- Paste text from a third-party word processor, such as Microsoft Word.
- Manually type, style, and format the text within Pangea.
Pasting text from Microsoft Word
When you paste text from the Microsoft Word desktop app, the following formatting is preserved:
- Links to other webpages
- Bulleted and numbered lists
- Basic styles (Bold, Underline, Italic,
Strikethrough) - Text alignment (left-align, right-align, center-align, justify)
- Basic tables
NOTE: If you paste from other sources, including web-based Microsoft Word, all the formatting listed above may not be preserved.
Text formatting and styling
To learn about formatting and styling options in the Pangea text editor, see the following article:
Insert embedded content
The page body can include text and the following types of inline embedded content:
- Images: Images from the Pangea The Graphic Database (GDB) is the centralized image library in Pangea CMS. All images on Pangea websites come from the GDB. In Pangea CMS, Pangea users can browse the existing GDB and upload new images. Learn more. (GDB) or from supported external wire agencies
- External media: Supported external media items (including items from YouTube, Facebook, Instagram, Telegram and many more popular platforms).
- Direct embeds: Content items (such as videos and galleries) that are interactive on the page.
- See also links: Card-style links (similar to a social media previews) that direct readers to a separate content page.
Insert embedded content
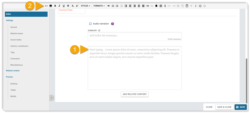
To get started inserting embedded content:
- Position the cursor where you want to insert the item.
- Click the Insert embedded content button.
- On the Search & attach dialog, find and select the item you want to insert.
For detailed instructions, see the following articles:
Additional layout options for feature stories
When you create a feature story, additional layout options are available for directly embedding the following content types:
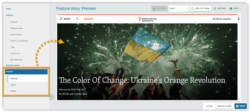
Preview the page
You can check how the published feature story will look for readers. Choose your preferred option under Preview in the left panel:
- Desktop: Check how the page will look when viewed on a desktop computer.
- Tablet: Check how the page will look when viewed on a tablet.
- Mobile: Check how the page will look when viewed on a mobile device.
The preview includes unsaved changes. You do not need to save changes before checking them in the preview.
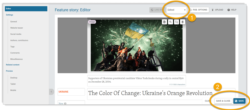
Request editorial review or publish
Every item has an internal publication status in Pangea. Three statuses signal different stages of the publication process:
- Draft: The page is not published. The content is still in progress and is not yet ready for editorial review.
- Edited: The page is not published. The first draft of the content is prepared and waiting for editorial review.
- Published: The page is published.

After fully preparing the content and all relevant settings, you can take one of the following actions:
Request editorial review
Request editorial review by changing the item's status from Draft to Edited. This signals to reviewers that the item is ready for their attention.
Follow these steps:
- Select Edited in the selector.
- Hit Save or Save & close.
The item now has the Edited status and is ready for review.
Publish immediately
If you have authorization, you can publish immediately. By publishing an item, you take responsibility for the quality and accuracy of the content.
Follow these steps:
- Select Published in the selector.
- Hit Publish or Publish & close.
The item is now live on your website. The publication date & time on the published page are set automatically to the moment of publication.
You can also schedule publication for a specific time and date in the future. For instructions, see the following article:

