What's inside this article:
- Basic information
- Social media teaser: Elements
- Social media settings
- AI-generated cards
- Updates after publication
Basic information
This article explains how to set up the social media teaser for a content page from Pangea CMS.
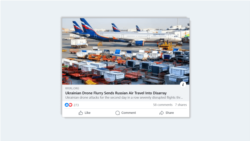
What is a social media teaser?
A social media teaser is like a rich link or preview, displayed when a story is shared on a social media platform or messaging app. Audiences on social media can tap or click the teaser to open the content page. A social media teaser might include:
- A title (or headline)
- An image
- An introduction
Teasers are displayed on platforms that support Open Graph metadata. This includes Facebook, X (formerly Twitter), Telegram, WhatsApp, LinkedIn, and many more.
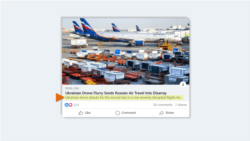
Social media teaser: Elements
The elements in the social media teaser come from the edit page for the story in Pangea CMS. To learn how each element is selected, review the sections below:
The title is selected as follows (if 1 is not filled, the data is taken from 2, and so on):
- Social media > Title
- Website teaser > Title
- General > Title

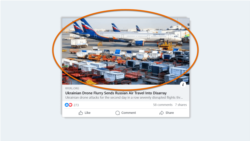
The image is selected as follows (if 1 is not filled, the data is taken from 2, and so on):
- Social media > Image
- Website teaser > Horizontal image
- General > Main visual
The introduction is selected as follows (if 1 is not filled, the data is taken from 2, and so on):
- Social media > Introduction
- Website teaser > Introduction
- General > Introduction
- The first characters from the Content
Social media settings
When you create a story in Pangea CMS, you can add Social media settings. The Social media settings are used to build the social media teaser.
NOTE: Social media settings are only visible on external social media platforms and messaging apps. This data will not be used anywhere on your website.
To open the Social media settings for a story:
- Open the edit page for the story in Pangea CMS.
- Select Social media in the left panel.

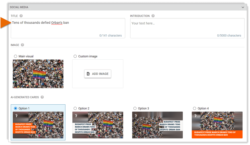
From the Social media settings, you might optimize the social media teaser as follows:
- Add shorter texts to ensure scanability and fit the stricter character limits on some social media platforms.
- Provide a hook to encourage curiosity and engagement with your content.
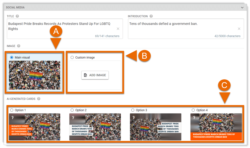
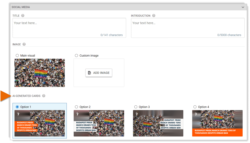
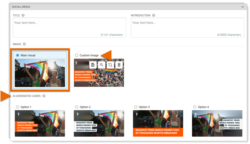
For the Image, the following options might be available:
- (A): Main visual: Use the image from the Main visual.
- (B): Custom image: Use a custom image. You can select an image from the Pangea GDB (Graphic Database) or a supported external wire agency.
- (C): AI-generated card: Use an AI-generated card. Cards are only available for text content types when this feature is enabled and configured for your site.
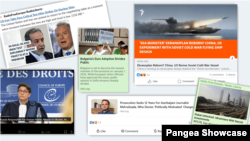
AI-generated cards
AI-generated cards are eye-catching visuals, intended for sharing on social media platforms. For supported content types, you can use an AI-generated card as the image in the social media teaser.
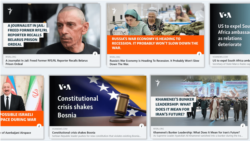
Each AI-generated card includes the following elements:
- The Main visual for the story
- The General title for the story
- The logo for your service or entity
AI arranges the elements in an attractive way, ensuring that key parts of the photo are not covered by text.
The following actions are available:
Request feature access
AI-generated cards are not available in Pangea CMS unless this feature is enabled and configured for your site. Contact Pangea Customer Care if your site would like to start using AI-generated cards.
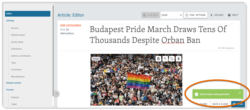
Generate cards
To generate a set of cards for a story:
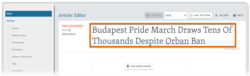
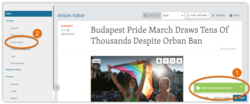
- Open the edit page for the story in Pangea CMS.
- Add the General title on the Editor subpage.
- Add the Main visual on the Editor subpage.
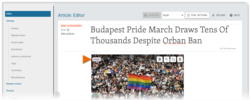
- Wait until you see the message: 'Social media cards generated'. This message should appear after 10-15 seconds.
- Hit Social media in the left panel.

Under AI-generated cards, four variants are available to choose from. You can select the option you want to use.
Set the Social title
AI-generated cards show the General title (not the Social title). You might also add a Social title via Social media > Title. This stops the same title from appearing twice in one teaser (in and below the card).
Generate new cards
Pangea AI will automatically generate new cards in the following cases:
- If you change the General title.
- If you replace the Main visual.
- If you crop the Main visual.
New cards are generated in around 10-15 seconds, after you perform one of the actions above. To see the new cards, hit Social media in the left panel.
After the General title / Main visual has been changed:
- The Main visual is selected as the Social media image.
- If an AI-generated card was previously selected, the card is no longer selected but remains available under Custom image.
- You can select one of the new AI-generated cards to use as the Social media image.
Updates after publication
Whenever possible, finalize all sharing data before publishing a story. If you update this data after publication, the changes may not appear on social media platforms (especially if significant time has passed). Once a story is shared on a platform, that platform caches the original sharing data and will continue displaying it for future shares, even if updates are made later in Pangea CMS.
Facebook Sharing Debugger
Facebook provides a Sharing Debugger tool that allows you to refresh the sharing data for a page. Once refreshed, the updated data will be used for future shares on Facebook (but not on other platforms). The tool is free to use and does not require login or authorization. You can access it using the link below:

