What's inside this article:
- Basic information
- Create a newsletter topic
- Create a new widget
- Add content
- Add a title
- Add a custom widget name
- Preview the widget
- Set the status and save the widget
- Localize text
- Embed the widget on a content page
Basic information
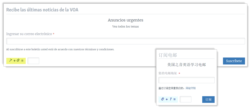
A Subscription widget can be used to promote a newsletter topic on the public site. Each Subscription widget is connected to one newsletter topic. From the Subscription widget, visitors can subscribe by entering an email address. The entered email address is then added to the mailing list for the newsletter topic.
IMPORTANT: The Subscription widget is connected to the inbuilt newsletter distribution tool in Pangea CMS. If your service uses a third-party tool for newsletter distribution (such as Mailchimp), you cannot use the Subscription widget to promote newsletter topics.
This article explains how to create a new Subscription widget from Pangea CMS.
Create a newsletter topic
Before you can create a Subscription widget, the newsletter topic needs to be created in Pangea CMS.
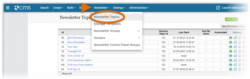
Via Newsletter > Newsletter topics, it is possible to review the list of existing newsletter topics for your service.
If you need a new newsletter topic, contact the Pangea Design team. We can assist with creating a new newsletter template, including design and code. To contact us, follow the link below:
Create a new widget
The following segments might include a Subscription widget:
- Sections (including your homepage)
- Infopages
- Landings
- You Might Also Like (YMAL)
To create a new Subscription widget:
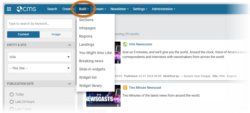
- Go to Build in the primary navigation. Select a segment type, depending where you want to display the widget (Sections, Infopages, Landings, or YMAL).
- Select the name of the specific segment where you want to display the widget.
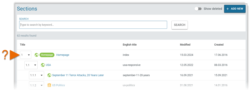
- Ensure Editor is selected.

- Select the empty area where you want to add the widget.
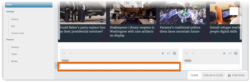
- Select New widget > Subscription to start creating a new Subscription widget.

The widget edit page opens in the same tab.
NOTE: You can also create a new Subscription widget from the Widget library.
The chapters below describe each stage of the creation process:
Add content
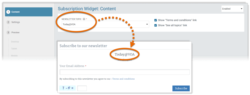
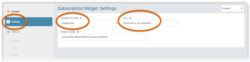
On the Content subpage, define the main widget content.

The following options are available:
Newsletter topic
Under Newsletter topic, select the existing newsletter topic that will be promoted on this widget.
Go to Create a newsletter topic to learn how to create a new newsletter topic.
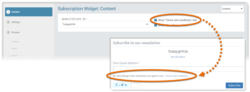
Show "Terms and conditions" link
Tick Show "Terms and conditions" link to include a link to your Privacy Policy page. It is required by law to include this link on the widget.
Set the exact text and URL for the link using the Site localization tool in Pangea CMS. For details, go to the following section:
If your site does not have a Privacy Policy page, we suggest creating one. Privacy Policy pages are normally created as Infopages. To learn how to build a new Infopage from Pangea CMS, see the following article:
You can find an example of a Privacy Page on the Pangea Showcase site:
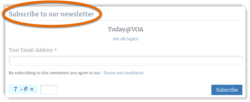
Show "See all topics" link
Tick Show "See all topics" link to include a link to your service's subscription page, which lists all the newsletter topics offered by your service. This is helpful if your service offers multiple newsletter topics.

Set the exact text and URL for the link via the Site localization tool in Pangea CMS. For details, go to the following section:
Add a title
A Subscription widget includes the name of the newsletter topic by default.
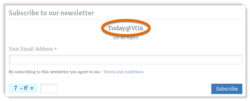
You can also add a title that is displayed above the widget.
To add a widget title:
- Go to Settings.
- Under Header options, select Display title.
- Under Title, enter your chosen title.
Add a custom widget name
Via Settings > Widget name, optionally customize the default widget name.
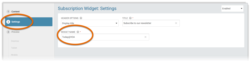
The widget name is visible only in Pangea CMS (not on the public site). We suggest providing a descriptive name if your site uses the Widget list tool in Pangea CMS to manage widgets.
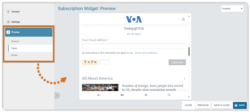
Preview the widget
On the Preview subpage, check how the Subscription widget will look when it is displayed on the public site. Select Desktop, Tablet, or Mobile to preview the widget on devices with different screen sizes.
Set the status and save the widget
Before saving the Subscription widget, select your preferred status using the drop-down menu in the top-right corner:
- Enabled: After you save the widget, it will be displayed on the public site (if it is included on a published page).
- Disabled: After you save the widget, it will not be displayed on the public site. However, it will be available for further editing in Pangea CMS.
Select Save or Save & close to save the widget.

Localize text
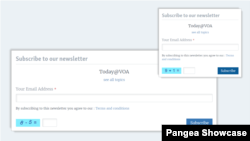
By default, all text on Pangea websites is displayed in English. Before you publish a Subscription widget, ensure that all the widget text is localized for your site. The following text needs to be localized:
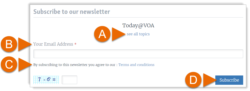
- (A): "See all topics" link and link text
- (B): "Your Email Address" text
- (C): "Terms and conditions" link and link text
- (D): "Subscribe" text
Localize the text using the Site localization tool in Pangea CMS. The same text will appear on every Subscription widget that is published on your site. For instructions, see the following article:
Find an overview of the relevant config keys below:
| Global default value | Key | |
|---|---|---|
| (A) | <a href="/subscribe.html">see all topics</a> | Widgets.Subscription.AllTopics |
| (B) | Your Email Address | Widgets.Subscription.YourEmailAddress |
| (C) | By subscribing to this newsletter you agree to our: <a href="https://pressroom.rferl.org/p/6116.html" target="_blank">Terms and conditions</a> | Widgets.Subscription.TermsAndConditions |
| (D) | Subscribe | Widgets.Subscription.ButtonSend |
Embed the widget on a content page
You can embed a Subscription widget into the body of a text content page. This is a great way to motivate your engaged userbase. A Subscription widget can be embedded on the following content page types:
- Article
- Blog
- FactCheck (embed in the Verdict content)
- Feature
- Feature story
- Live blog (embed in a post)
- News
- Transcript
First, you need to retrieve the embed code for the Subscription widget from the widget edit page in Pangea CMS. This option is only available after the widget has been saved. For instructions, see the following article:
Then, open the edit page for the story where you want to embed the widget. Follow these steps:
- On the Editor subpage, click inside the main box to reveal the text editor bar. Position the cursor where you want to insert the widget.

- Hit the Insert Embedded Content button.
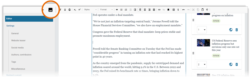
- Select External media.
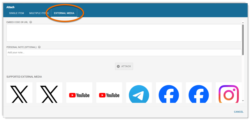
- Under External media URL or embed code, paste the embed code.
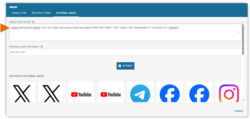
- Under Personal note, optionally enter a note. Personal notes are displayed only in Pangea CMS (not on the public site). The purpose is to let other Pangea CMS users verify what has been embedded.

- Hit Attach.

You see a placeholder representing the embedded widget in the text editor box.


