
About
The Newsletter topics option is used for creating the groups of articles you want to share with the subscribers. If you want to create a new emailer topic, send us a request with all the details and let us help you with the configuration. When the topic is ready, you will see it on the Newsletter Topics page.
Getting Started
To open the Emailer Topics, you start by clicking the Newsletter button. Then choose the Newsletter Topics.
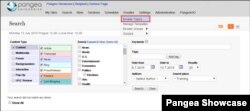
As you can see in the following picture, this page displays the list of topics. Each one has its own:
- Id number
- English Name
- Goolara Topic Id (assigned by Goolara)
- exact time when the topic was sent for the last time (Last Sent)
- indication whether the topic is Sort(ed) by Zone
- indication whether the topic is Automated
To manage the particular topic you can use one of the Action buttons:

1. Send Newsletter – Attach Items opens the page where you can manually attach the content to your topic and share it with the subscribers
2. Send Newsletter – Manual Composer opens the page where you can manually create the content of your topic and share it with the subscribers
3. Edit Topic opens the topic for editing
4. Delete deletes the topic

Send Newsletter - Attach Items
By clicking Send Newsletter – Attach Items button you can open the page with following options: Search Content, HTML Edit, Text Edit and Send Mailing.
1. Search Content Tab
This tab enables you to find a content you want to share with the subscribers. You could share content like Photogallery, Video, Soundslide, Article, Transcript, News, Blog, Press Release, Feature, Live Blogging and newly also Infographics. For the general information about Article Content see this article.

2. HTML Edit Tab
Once you’ve attached the content, you can edit the HTML version of your newsletter. To do the layout changes using the CKEditor, you start by clicking the HTML Edit button.
3. Text Edit tab
To edit the textual version of the newsletter, click the Text edit button.

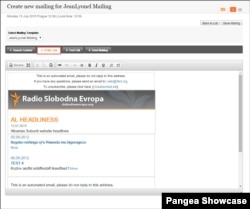
4. Send Mailing Tab
This page displays the final version of your newsletter. You can also:
- fill in the Email subject
- test the newsletter features by sending a Preview Email (enter a valid e-mail address and click the Send Preview button)
- send the newsletter to Goolara by clicking the Queue Mailing button
In case you need to go back to your Emailer Topics page, click the Back to List button. If you want to save the topics with the attached content, click the Save Mailing button.

Send Newsletter - Manual Composer
By clicking Send Newsletter – Manual Composer button you can manually create the content of your topic. This option is usually suitable for advanced HTML and Java Script users. Please notice that the Search Content tab is disabled. Besides that you can use the same features as in the Attach Items option .

Editing Newsletter Topics
- fill in the English Title
- fill in the Localized Title in a local language
- display the Number of Subscribers
- fill in the Localized Description in a local language
- choose one of the Topic Default Templates
- enable subscription by checking the Subscription Enabled box
- sort the topics by Zone by checking the Sort by Zone box
- send the newsletter automatically on particular day and time by checking the Automation Enabled box
- fill in the Subscription Doc. Id (Goolara internal ID number)
- fill in the Topic Id (Goolara internal ID number)
- check the Track Links box if you want to track further user clicks

After checking the Automation Enabled box you can adjust even more features:
- choose the particular Content type
- define Zones
- choose one of the entities (Search entity)
- set the Maximum number of items in a newsletter
- set the Minimal number of items in a newsletter
- fill in the emails of persons responsible for administration (Email Admins)
- Define Schedule of a newsletter by choosing the particular day and time

Manage Subscribers Tab
To add or remove the e-mail addresses, you start by clicking the Manage Subscribers tab. After that continue by typing the e-mail addresses (separated by comma) into Email Addresses box. You can add the recipients by clicking the Subscribe recipients button or remove them by pressing the Unsubscribe recipients button. The results of taken actions can be checked in the Subscription Results box.

Mailing History Tab
To check the statistics of particular emailer topic, you start by clicking the Mailing History tab. Then set the period and display the results by clicking the Search button. After that you can find out whether the particular topic was sent in an Automated mode and when it was sent to subscribers (Sent Date).
The Actions buttons allow you to:

1. Analyze Mailing (show the statistics of particular topic - the amount of recipients, delivery success of your topic etc.)
2. Preview Mailing (show the topic in its published form)
