
What's inside this article:
- Basic information
- Copy and paste text
- Style and format text
- Insert embedded content
- Insert simple links
- Insert an Expandable note
- Insert an Inline note
- Insert a quote
- Insert a list
- Set the text alignment
- Create an anchor
- Insert a table
- Insert a special character
- Use HTML editor
- Use keyboard shortcuts
Basic information
Pangea CMS offers a WYSIWYG (What You See Is What You Get) rich text editor for crafting text-based content. This article describes the full text editor functionality (all possible options). Full text editor functionality is available for creating the following types of content:
- Article
- Blog
- FactCheck (available for creating the Verdict content)
- Feature
- Feature story
- Live blog (available for creating a Blog post)
- News
- Transcript
NOTE: When you create other types of content, the text editor includes a smaller selection of options. You should see only the options that are suitable for the type of content you are creating.
Copy and paste text
You can manually type into the Pangea text editor, or paste text that was created in an external word processor (such as Microsoft word).
The following keyboard shortcuts might be useful for copying and pasting text:
Copy text
Highlight the text you want to copy, then press the following keys on your keyboard at the same time:
- PC: Ctrl + C
- Mac: ⌘ Command + C
Paste text
Position the cursor where you want to insert the text, then press the following keys on your keyboard at the same time:
- PC: Ctrl + V
- Mac: ⌘ Command + V
When you paste text into the Pangea text editor, the text is automatically converted to the correct font for your site and to normal (paragraph) size.
The following actions are available:
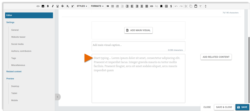
When you paste as plain text, all formatting is removed.
To paste as plain text:
- Copy the text to your clipboard.
- Position the cursor where you want to insert the text.
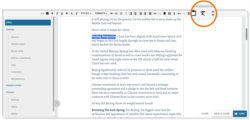
- In the text editor bar, hit the Paste as plain text button.
- Under Content, paste the text using the Ctrl + V / ⌘ Command + V keyboard shortcut.
- Hit Add.
Style and format text
Our text editor offers the following options for styling and formatting text:
Inline styles
Inline styles let you style individual words / phrases within a block of text. The following inline styles are available:
Bold
Italic
Underline
Strikethrough
Subscript (such as the number 2 in H2O)
Superscript (such as the number 2 in E=MC2)
Big
Small
Typewriter
Highlight
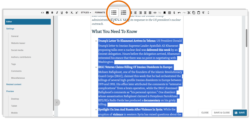
Access the basic inline styles directly in the text editor bar.
More inline styles are available via Styles > Inline styles.
The following actions are available:
To remove an inline style:
- Highlight the styled text.
- Hit the Remove formatting button in the text editor bar.
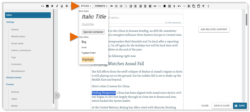
Block styles
Block styles let you style a block of text (a paragraph or heading). The following block styles are available:
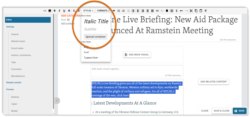
Italic title
Subtitle
Special container
Access block styles via Styles > Block styles.
The following actions are available:
To remove a block style:
- Highlight the styled text.
- Hit the Remove formatting button in the text editor bar.
Formats (headings)
Formats let you format a block of text (a paragraph or heading). Choose from the following formats:
Normal text
Heading 1
Heading 2
Heading 3
Heading 4
Heading 5
Heading 6
Access formats in the Formats selector.
The following actions are available:
To remove a format:
- Highlight the formatted text.
- Go to Formats > Normal text.

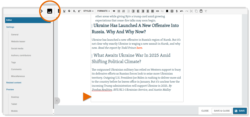
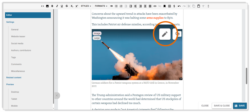
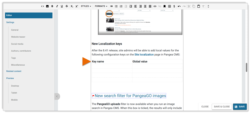
Insert embedded content
You can insert the following types of embedded content:
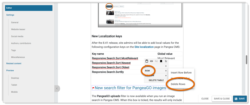
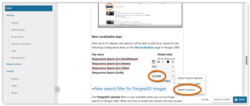
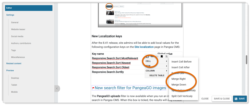
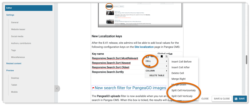
- Images: Images from the Pangea The Graphic Database (GDB) is the centralized image library in Pangea CMS. All images on Pangea websites come from the GDB. In Pangea CMS, Pangea users can browse the existing GDB and upload new images. Learn more. (GDB) or from supported external wire agencies
- External media: Supported external media items (including items from YouTube, Facebook, Instagram, Telegram and many more popular platforms).
- Direct embeds: Content items (such as videos and galleries) that are interactive on the page.
- See also links: Card-style links (similar to a social media previews) that direct readers to a separate content page.
For detailed information, see the relevant article below:
The following actions are available:
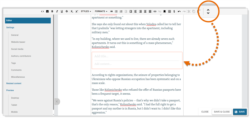
To insert an embed:
- Position the cursor where you want to insert the item.
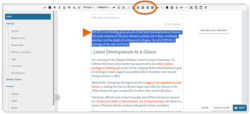
- Hit the Insert embedded content button in the text editor bar.
For detailed instructions, see the relevant article below:
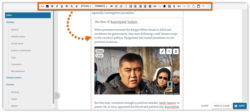
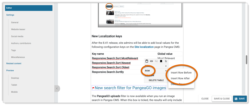
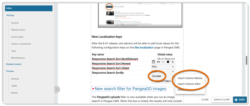
After you insert an embed, you see a placeholder representing the embed in the Pangea text editor.
To see exactly how the embed will look on the published page, select Preview in the left panel. You see a preview of the published page. You can check how the page will look when viewed on desktop, tablet, and mobile.

To update the settings for an embed, select Edit on the placeholder. (This option is not available for all types of embeds.)
You cannot edit the actual content, but you can change how the embed is displayed on the current page. For example, for an embedded image, you might change the caption or size.
To remove an embed, select Remove on the placeholder.

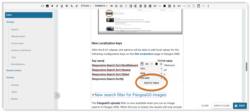
Insert simple links
You can insert a simple contextual link to another webpage (on the same site or on an external site). When you insert a simple link, you can choose how the link will open:
- Open in new tab: The link will open in a new tab. You might use this option for links to external sites.
- Open in same window: The link will open in the same tab. Always use this option for links to the same site.
NOTE: You can also insert rich 'See also' links (featuring an image) to content pages published on your own site or on partner websites under the same entity. Find more details in the Insert embedded content chapter of this article.
The following actions are available:
To insert a simple link:
- Highlight the link text.
- Hit the Add / Edit link button in the text editor bar.
- Under Link, ensure Link to URL is selected.
- Under URL and Protocol, define the URL for the link.
- Under Link option, choose how the link will open.
- Hit Add.
The following rules apply when you enter the URL:
- You do not need to include www. or the protocol (https://). For example, you might enter just 'rferl.org/Farda-English'.
- Relative links to the same site are not supported. For example, you need to enter 'rferl.org/Farda-English' (not 'Farda-English').
- If you face issues, ensure the URL does not include a trailing space at the end. You will not be able to add the link if the URL includes a space.
To edit a simple link:
- Right-click the link.
- Hit Add / Edit link.
To remove a simple link:
- Right-click the link.
- Hit Unlink.
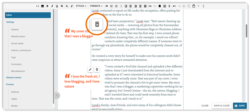
Insert an Expandable note
An Expandable note is an interactive element, which your readers can manually open and close. Expandable notes help you to tell rich and immersive stories without overwhelming the page with too much content.
You can use Expandable notes to share non-essential details, such as:
- Background information
- Historical context
- Profiles of key figures
- Side stories
This option is especially useful for long-read content and investigative journalism.
The following actions are available:
To insert an Expandable note:
- Position the cursor where you want to insert the Expandable note.
- Hit the Add Expandable note button in the text editor bar.
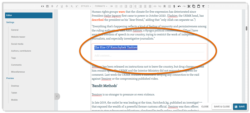
A placeholder appears for the new expandable note. Click inside the placeholder to add the title and content. The title for an Expandable note can include just basic text. The content might include:
- Paragraphs and headings
- Styled text
- Links
- Lists
- Embedded content
When adding content to an Expandable note, you can use the options in the main text editor bar.
To delete an Expandable note, manually delete all the text and embeds from inside the placeholder. When it is empty, the placeholder disappears.
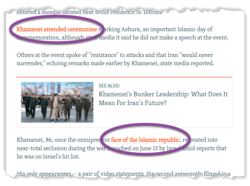
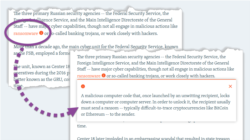
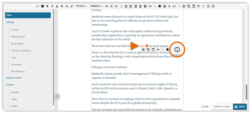
Insert an Inline note
Pangea now supports Inline notes on text content pages. An Inline note is a simple explanation of a word or phrase, which readers can manually open by clicking or tapping the launcher text.
You can use Inline notes to explain potentially confusing words and phrases, without overwhelming the page with too much content. Inline notes help to make your content more accessible, especially for readers who do not have a deep understanding of the subject matter.
The following actions are available:
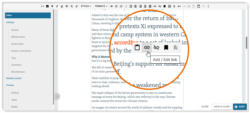
To insert an Inline note:
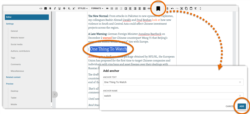
- Highlight the launcher text (the word or phrase you want to explain).
- Hit the Add / Edit Inline note button in the text editor bar.
- Under Content, enter the explanation. Then, hit Add.
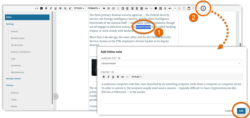
The Inline note is inserted and marked with the i icon.
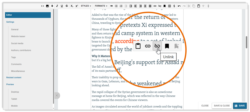
To edit an Inline note:
- Right-click the launcher text.
- Select Add / Edit Inline note.
- Edit the Launcher text / Content, then hit Update.
The Inline note is updated.
To remove an Inline note:
- Right-click the launcher text.
- Select Remove Inline note.

The Inline note is removed and the content inside the note is permanently deleted.
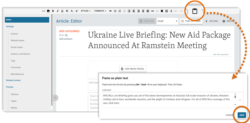
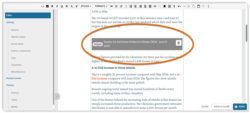
Insert a quote
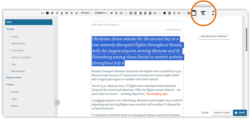
You can insert an eye-catching, stylized quote. This draws the reader's attention to a key statement from a figure in your story. You might choose to highlight a quote that is particularly significant, insightful, or emotive.

Optionally show a footer below the quote. This tells your readers the source of the quote (normally the person who said the words). The footer can function as a link to another webpage, where readers can get more details and verify that the quote is genuine.

NOTE: Quotes are automatically displayed in the primary color from your brand pallet. You cannot change the color for individual quotes.
The following actions are available:
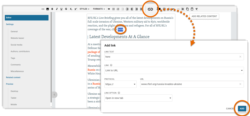
To insert a quote:
- Position the cursor where you want to insert the quote.
- Hit the Add quote button in the text editor bar.
- Under Quote, enter the quote. You do not need to include quotation marks.
- Under Footer text, optionally add the source of the quote (normally the person who said the words).
- Under Footer URL, optionally enter a URL to link from the footer.
- Tick Display quotation mark to show an enlarged quotation mark.
- Hit Add.

To edit a quote, hit the Edit button in the placeholder.

To remove a quote, hit the Remove button in the placeholder.
Insert a list
You can insert the following lists:
- Unordered (bulleted) lists
- Ordered (numbered) lists
The following actions are available:
To insert a list:
- Enter the list items. After every item, press the enter key on your keyboard.
- Highlight all the list items.
- Hit the relevant button in the text editor bar:
- Add / remove bulleted list
- Add / remove numbered list
To remove a list:
- Highlight the list.
- Hit the relevant button in the text editor bar:
- Add / remove bulleted list
- Add / remove numbered list
Set the text alignment
You can change the alignment for a block of text (a paragraph or a heading). The following options are available:
Align left
Center
Align right
Justify text Justify text Justify text Justify text Justify text Justify text Justify text Justify text Justify text Justify text Justify text Justify text Justify text Justify text Justify text Justify text Justify text Justify text Justify text Justify text Justify text Justify text Justify text Justify text Justify text Justify text Justify text Justify text Justify text Justify text Justify text Justify text Justify text Justify text Justify text
The following actions are available:
To change the text alignment:
- Highlight the text you want to align.
- Hit the relevant button in the text editor bar:
- Align left
- Center
- Align right
- Justify
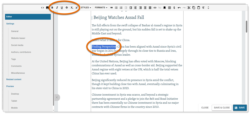
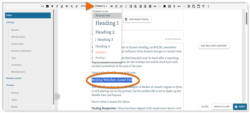
Create an anchor
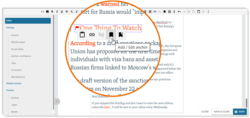
You can create an anchor within the text. After the anchor is created, you can insert a link on the same page that points to the anchor. This directs your readers to a different part of the same page to get more details on a particular topic. In the text editor, each anchor is marked with a red flag.
The following actions are available:
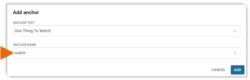
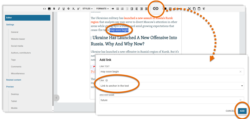
To create an anchor:
- Highlight the anchor text.
- Hit the Add anchor button in the text editor bar.
- Under Anchor name, create a name for the anchor.
- Hit Add.
When you create the Anchor name, consider the following:
- We suggest using only lower-case letters with no spaces.
- You cannot use the same anchor name multiple times on the same page.
- When you insert a link to the anchor, you will need to enter the anchor name.
- The name will be visible in the URL after a visitor clicks a link to the anchor.
To insert a link to an already created anchor on the same page:
- Highlight the link text.
- Hit the Insert link button in the text editor bar.
- Under Link, select Link to anchor in the text.
- Under Anchor name, enter the exact anchor name for the relevant anchor.
- Hit Add.
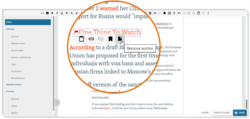
To insert a link to an anchor, you need to know the anchor name. To check the anchor name:
- Right-click the anchor text (marked with a red flag).
- Select Add / Edit anchor.
To remove an anchor:
- Right-click the anchor text (marked with a red flag).
- Select Remove anchor.
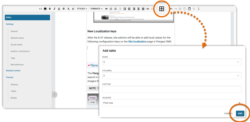
Insert a table
You can insert a simple table, like the one below:
| Header one | Header two | Header three |
|---|---|---|
| Table content | Table content | Table content |
| Table content | Table content | Table content |
The following actions are available:
To insert a table:
- Position the cursor where you want to insert the table.
- Hit the Add table button in the text editor bar.
Provide the following details:
- Rows: Specify the number of horizontal rows. You will be able to add and delete rows later if needed.
- Columns: Specify the number of vertical columns. You will be able to add and delete columns later if needed.
- Caption: Optionally provide a caption to display above the table. The caption typically summarizes the table contents.
- Headers: Specify which cells (if any) will be header cells. Header cells have a gray background.
When you are ready, hit Add.
The empty table appears in the text editor. Click inside any cell to start entering text. The width and height of each cell is set automatically, according to the amount of text.
To add a new row to an existing table:
- Right-click inside a cell and select Row.
- Click Insert row before or Insert row after.
To add a new column to an existing table:
- Right-click inside a cell and select Column.
- Click Insert column before or Insert column after.
To delete a row from an existing table:
- Right-click inside the row you want to delete.
- Go to Row > Delete rows.
To delete a column from an existing table:
- Right-click inside the column you want to delete.
- Go to Column > Delete columns.
To merge two cells into one:
- Right-click inside the left-most or top-most cell you want to merge.
- Go to Cell.
- Select Merge right or Merge down.
To split one cell into two:
- Right-click inside the cell you want to split.
- Go to Cell.
- Select Split cell horizontally or Split cell vertically.
To delete a table:
- Right-click inside the table.
- Select Delete table.
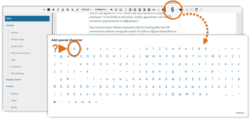
Insert a special character
You can insert a special character (such as $, ©, or ½).
The following actions are available:
To insert a special character:
- Position the cursor where you want to insert the special character.
- Hit the Insert special character button in the text editor bar.
- Select the special character you want to insert.
Use HTML editor
HTML editor lets you create and adjust content using HTML code.
Hit the HTML editor button to open HTML editor.
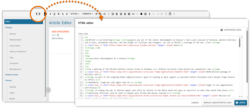
For detailed information and a list of supported code, see the following article:
Use keyboard shortcuts
Our text editor supports the following keyboard shortcuts:
- Bold (Ctrl + B) / (⌘ Command + B)
- Italic (Ctrl + I) / (⌘ Command + I)
- Underline (Ctrl + U) / (⌘ Command + U)
- Copy (Ctrl + C) / (⌘ Command + C)
- Paste (Ctrl + V) / (⌘ Command + V)
- Cut (Ctrl + X) / (⌘ Command + X)
- Undo (Ctrl + Z) / (⌘ Command + Z)
- Redo (Ctrl + Y) / (⌘ Command + Y)

