What's inside this article:
- Basic information
- Add the page title
- Add categories
- Add an introduction
- Add a main visual
- Add authors
- Add the main content
- Insert embedded content
- Add a URL slug
- Preview the page
- Request editorial review or publish
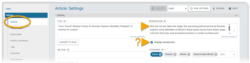
Basic information
This article explains how to create articles and other article-based content pages in Pangea CMS. This means the following Pangea content types:
- Article, Blog, Feature, News, Transcript
These article-based content types have the same settings in Pangea CMS but have different editorial purposes. For details, see our overview of text content.
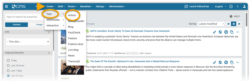
Get started
To create a new article-based content page, go to Create > Text. Then, select the type of content you want to create. The edit page for your new story opens in the same tab.
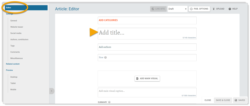
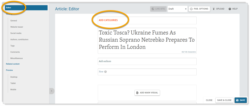
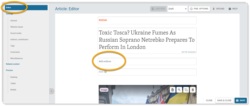
Add the page title
Every article needs a main title. You can also create additional titles that appear in different contexts, such as on your homepage or on social media.
Main title
Add your main title via Editor > Add title.
If you don't add additional titles, the main title appears:
- On the published article page
- In teaser cards on your website
- In teaser cards on social media
Additional titles (optional)
You can create additional titles for different contexts. For example:
- A shorter headline to fit seamlessly on a homepage widget
- A shorter, punchier headline to show on social media
Add categories
Categories organize your website content by topic. For example, your website might have a 'Politics' category for all political content.
Every article must have at least one category, but you can add multiple categories if needed. For example, an article about Romania's 2024 elections might be categorized under 'Romania', 'Politics', and 'Elections'.
When an article has multiple categories, one serves as the primary category and the others serve as secondary categories. To learn more about this distinction, see the following article:
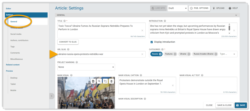
To add one or more categories, go to Editor > Add categories.
When you add categories in Pangea, the primary category appears in a blue chip. To change the primary category, click the chip for a different category to make it the primary category. Secondary categories appear in gray chips.

Add an introduction
We recommend creating an introduction for every article. Although this is not required, an introduction is important for:
- Attracting readers: Your introduction appears in teaser cards across your website and social media.
- Search engine optimization (SEO): Your introduction is used as the meta description, which helps search engines like Google to rank your page.
You can create up to three different introductions that appear in different contexts:
- Main introduction: Appears on the article page (optional), as well as in teaser cards and as the meta description.
- Teaser introduction: Replaces the main introduction in teaser cards and as the meta description.
- Social introduction: Replaces other introductions only in teaser cards on social media.
Learn more in the sections below:
Two methods are available for adding the main introduction:
- Via Editor > Add introduction (only available if your site displays introductions by default on article pages)
- Via General > Introduction (available for any article)
To display the introduction on the article page, ensure Display introduction is ticked in the General settings.
NOTE: The Display introduction setting controls if the introduction appears on the article page. If this is unticked, your introduction may still appear in teaser cards and as the meta description.
The main introduction appears:
- On the article page (if Display introduction is ticked in the General settings)
If you don't create additional introductions, the main introduction also appears:
- In teaser cards on your website
- In teaser cards on social media
- As the meta description
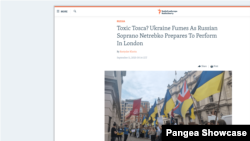
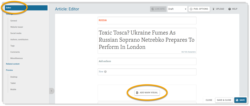
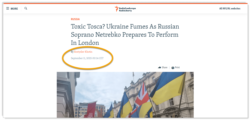
Add a main visual
The main visual is the primary image or video that appears with your article. To add a main visual:
- Go to Editor > Add main visual.
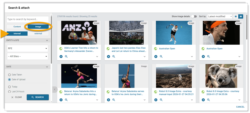
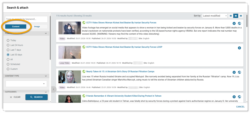
- On the Search & attach dialog, find and select the item you want to use.
The main visual appears:
- On the published article page
- In teaser cards on your website
- In teaser cards on social media
The following content types are commonly used as main visuals:
You can use a horizontal image as the main visual.
To search images, select the Image tab. The following options are available:
- Internal: Images from the Pangea The Graphic Database (GDB) is the centralized image library in Pangea CMS. All images on Pangea websites come from the GDB. In Pangea CMS, Pangea users can browse the existing GDB and upload new images. Learn more. (GDB). These images have already been uploaded to Pangea by Pangea users.
- External: Images from external wire agencies (Reuters and AFP). You can search and select the image you want to use.
For detailed information on how to search for images in Pangea, see our image search guide.
Aspect ratio
To avoid losing important parts of your image, select an image with the 16:9 aspect ratio. If you use an image with a different aspect ratio, Pangea will crop it to 16:9.
For detailed information about aspect ratio, see our aspect ratio guide.
Manual cropping
To manually crop the image, click the Crop image button. Click and drag the box to reposition the crop area. Manual cropping maintains the standard 16:9 ratio.
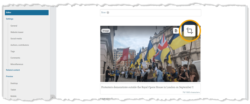
Main visual caption
In the box below the main visual, write a caption in your local language. The caption appears below the visual on the public site. An effective caption provides context for the visual and explains its relevance to the story.

You can hit the Image detail button to view the internal image description and metadata. We provide this data to help you formulate the caption.
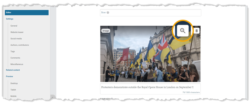
Image upload
To use an image that is saved on your device, first upload the image to Pangea. For instructions on how to upload images, see our image upload guide.
You can use a loop video as the main visual. A loop video is a short video that autoplays on repeat with no sound.
To search loop videos, select the Content tab. For detailed information on how to search for content in Pangea, see our content search guide.
Main visual caption
In the box below the main visual, write a caption in your local language. The caption will appear below the visual on the public site. An effective caption provides context for the visual and explains its relevance to the story.
Loop video upload
Pangea can automatically convert a standard video file into a loop video during upload. For detailed information on how to upload a video file for use as a loop video, see our loop video guide.
You can use a video (horizontal or vertical) as the main visual. When a video is the main visual, readers can watch the video without leaving the page.
To search videos, select the Content tab. For detailed information on how to search for content in Pangea, see our content search guide.
Main visual caption
In the box below the main visual, write a caption in your local language. The caption will appear below the visual on the public site. An effective caption provides context for the visual and explains its relevance to the story.
Video upload
To use a video that is saved on your device, you first need to upload the video to Pangea and publish it. For detailed instructions, see our video upload guide.
Add authors
An article can have one or multiple authors. These names appear prominently with the title at the top of the article page. By showing author names on article pages, you help to build trust with your audience and boost the authority of your site.

To add one or more authors:
- Go to Editor > Add authors.
- Search for and select the authors you want to use.
You can choose an author from the approved list of authors for your site. To learn how to add a new author to this list, see the following article:
Add the main content
To start adding content, click inside the main box on the Editor subpage. While this box is active, the toolbar is available. If you click elsewhere on the page, the toolbar disappears.
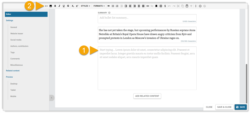
For adding text, two options are available:
- Paste text from a third-party word processor, such as Microsoft Word.
- Manually type, style, and format the text within Pangea.
Pasting text from Microsoft Word
When you paste text from the Microsoft Word desktop app, the following formatting is preserved:
- Links to other webpages
- Bulleted and numbered lists
- Basic styles (Bold, Underline, Italic,
Strikethrough) - Text alignment (left-align, right-align, center-align, justify)
- Basic tables
NOTE: If you paste from other sources, including web-based Microsoft Word, all the formatting listed above may not be preserved.
Text formatting and styling
To learn about formatting and styling options in the Pangea text editor, see the following article:
Insert embedded content
The article body can include text and the following types of inline embedded content:
- Images: Images from the Pangea The Graphic Database (GDB) is the centralized image library in Pangea CMS. All images on Pangea websites come from the GDB. In Pangea CMS, Pangea users can browse the existing GDB and upload new images. Learn more. (GDB) or from supported external wire agencies
- External media: Supported external media items (including items from YouTube, Facebook, Instagram, Telegram and many more popular platforms).
- Direct embeds: Content items (such as videos and galleries) that are interactive on the page.
- See also links: Card-style links (similar to a social media previews) that direct readers to a separate content page.
To get started inserting embedded content:
- Position the cursor where you want to insert the item.
- Click the Insert embedded content button.
- On the Search & attach dialog, find and select the item you want to insert.
For detailed instructions on how to insert embedded content, see the following articles:
Add a URL slug
A URL slug is a string of human-readable text, separated by hyphens. A clear and concise URL slug helps to improve usability by telling you exactly where you will go after clicking a link. Human-readable slugs also help pages to rank more highly on search engine results pages.

Add a URL slug via General > URL slug.
Follow the guidelines below:
- Use the local language for your site.
- Use clear, human-readable language.
- Separate words with hyphens ('new-york' not 'newyork').
The content of the URL slug should be similar to the main title. However, it does not need to match the title exactly. To keep your slug concise:
- Include just words that are essential to convey meaning.
- Do not include words with no semantic value (such as 'a' and 'the').
- Do not include prepositions and linking words (such as 'and', 'of', and 'at').
For detailed information with examples, see the following article:
Preview the page
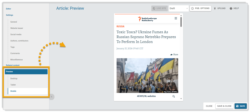
You can check how the published article will look for readers. Choose your preferred option under Preview in the left panel:
- Desktop: Check how the page will look when viewed on a desktop computer.
- Tablet: Check how the page will look when viewed on a tablet.
- Mobile: Check how the page will look when viewed on a mobile device.
The preview includes unsaved changes. You do not need to save changes before checking them in the preview.
Request editorial review or publish
Every item has an internal publication status in Pangea. Three statuses signal different stages of the publication process:
- Draft: The page is not published. The content is still in progress and is not yet ready for editorial review.
- Edited: The page is not published. The first draft of the content is prepared and waiting for editorial review.
- Published: The page is published.

After fully preparing the content and all relevant settings, you can take one of the following actions:
Request editorial review
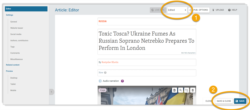
Request editorial review by changing the item's status from Draft to Edited. This signals to reviewers that the item is ready for their attention.
Follow these steps:
- Select Edited in the selector.
- Hit Save or Save & close.
The item now has the Edited status and is ready for review.
Publish immediately
If you have authorization, you can publish immediately. By publishing an article, you take responsibility for the quality and accuracy of the content.
Follow these steps:
- Select Published in the selector.
- Hit Publish or Publish & close.
The item is now live on your website. The publication date & time on the published page are set automatically to the moment of publication.
You can also schedule publication for a specific time and date in the future. For instructions, see the following article:

