What's inside this article:
- Basic information
- Add the General title and URL slug
- Add Categories
- Add the Main visual
- Add Statement settings
- Add Verdict settings
- Add authors
- Manage the status and publish
- Share FactCheck content
Basic information
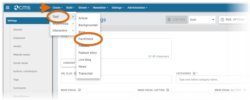
This article explains how to create and publish a new FactCheck page from Pangea CMS. To get started, go to Create > Text > FactCheck.
What is FactCheck?
FactCheck is a content page designed to present an objective analysis of a statement or claim that has been widely circulated and presented as fact. It’s a powerful tool for identifying misinformation and promoting accurate, evidence-based reporting.
Pangea offers special features for sharing FactCheck content. For details, go to the following chapter in this article:
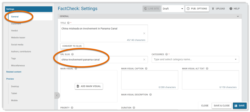
Add the General title and URL slug
It is essential to add a General title before saving or publishing the FactCheck. We also suggest adding a URL slug for every content page.
Add the General title
Via General > Title, add the General title for the FactCheck page.
The General title will be displayed as the headline on the published FactCheck page. This text is also used as the The meta title is included in the source code for a webpage and helps search engines to understand the content. It is normally displayed as the clickable headline on search engine results pages. Learn more. for the page.
Add the URL slug
After adding the General title, you can add a URL slug. Your slug will be included in the URL for the FactCheck page. This improves usability by telling users where they will go after clicking the link. URL slugs can also help your pages to rank more highly on search engine results pages.
Add a URL slug via General > URL slug.
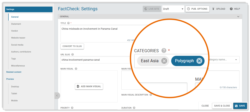
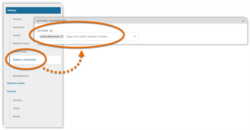
Add Categories
Every content page must have at least one Category. Categories act like folders on your computer, where items are stored and organized. A Category is normally a topic, such as 'Politics' or 'Sport'. For each content page, you can add one or more Categories. To get started, go to General > Categories.

Set the Primary Category
If you add multiple Categories, you need to set one Primary Category. Click the badge for your chosen Primary Category, so that it is marked blue. All other Categories will be added as Secondary Categories (marked gray).
The name of the Primary Category will be shown on the published FactCheck page. For detailed information about the significance of Primary and Secondary Categories, visit the following article:
Add the Main visual
Add a Main visual via General > Main visual. The Main visual will be displayed at the top of the published FactCheck page.
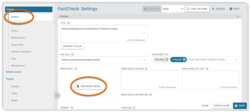
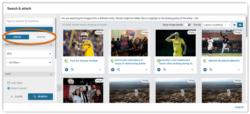
For a FactCheck page, the Main visual must be an image. To search for a Main visual, select the relevant tab:
- Internal: Images from the Pangea Graphic Database. These images have been uploaded by other Pangea CMS users.
- External: Images from supported external wire agencies.
For tips and information on how to run an image search in Pangea CMS, visit the following article:
After adding a Main visual, the following actions are available:
Via Main visual caption, provide a caption for the image. The caption will be shown directly below the image on the public site. An effective caption provides context for the image and explains its relevance to the story.
Under Main visual description, check the internal description. This information is provided to help you formulate the caption and is not displayed on the public site.
Pangea automatically crops the image to fit the 16:9 aspect ratio. You can avoid unwanted cropping by selecting an image that already fits this aspect ratio. For details, visit the following article:
To manually crop the image, hit the Crop image button. You can change which section of the image is visible, but you cannot change the aspect ratio.
Add alt text for the Main visual via General > Main visual alt text.
Alt text is a short and simple description of what’s visible in an image. It's included in the image’s HTML code and isn’t normally displayed on the page itself. Alt text serves several important purposes:
- Accessibility: Screen readers read alt text aloud for users who can’t see the image, including those with visual impairments.
- Fallback: If the image fails to load, the alt text appears in its place.
- SEO: Search engines use alt text to understand the content of images. Effective alt text can improve the visibility of your images in search results.
For detailed information with examples, visit the following article:
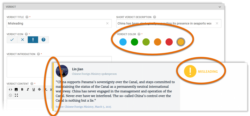
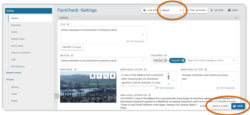
Add Statement settings
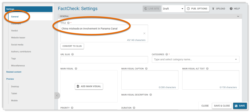
The statement is the claim that is objectively assessed on the FactCheck page. Hit Statement in the left panel to provide details relating to the statement.
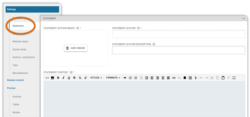
The following settings are available:
- Statement author image
- Statement author
- Statement author description
- Statement content
- Statement source
- Statement source URL
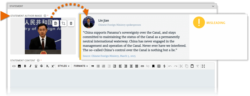
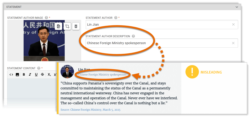
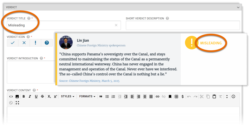
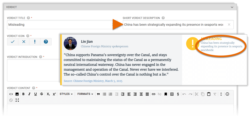
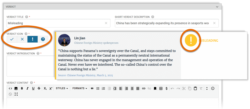
Statement author image
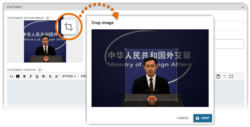
Under Statement author image, select a photo or image to represent the person or organization that issued the statement.
You might crop a photo to remove unnecessary background details and make the face more visible. To crop, hit the Crop image button.
If the image you want to use is saved on your device, you first need to manually upload the image to the Pangea Graphic Database. For instructions, visit the following article:
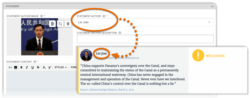
Statement author
Under Statement author, enter the name of the person or organization that issued the statement.
Statement author description
Under Statement author description, optionally provide further details about the Statement author.
For a person, you might mention:
- The organization they represent
- Their role in that organization
For example:
- Chinese Ministry of Foreign Affairs spokesperson
For an organization, you might mention:
- The type of organization
- The country where the organization is based
For example:
- Chinese state-run English newspaper
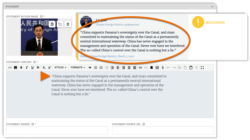
Statement content
Under Statement content, enter the exact statement. We suggest surrounding the statement in quotation marks, for example:
- “We have never invaded any country. We have never started any proxy war. We have never engaged in global military operations or threatened other countries with force.”
In most cases, the 'Statement content' should include just plain text.
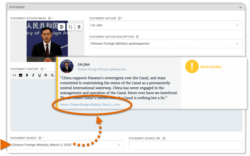
Statement source
Under Statement source, enter the name of the platform where the statement was published. Optionally provide a date, for example:
- China Daily's Weibo account, February 13, 2023
Possible sources include:
- Websites
- Social media accounts
- Newspapers
- TV channels
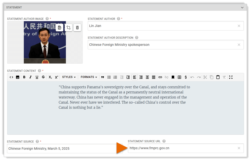
Statement source URL
Under Statement source URL, optionally enter a URL that will direct readers to the third-party webpage for the Statement source. If you provide a URL, the 'Statement source' text on the public site will function as a link to this URL. You need to enter the full URL (including https://).
Including a Statement source URL lets visitors verify your source and boosts the authority of the story.
Add Verdict settings
The verdict is the objective assessment of the statement. Hit Verdict in the left panel to enter details relating to the verdict.
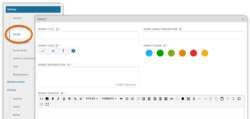
The following settings are available:
Verdict title
Under Verdict title, enter a direct and simplified verdict. You might use the following titles:
- True
- False
- Likely false
- Misleading
- Unsubstantiated
TIP: If your site plans to publish regular FactChecks, define a limited collection of approved 'Verdict titles' and use these titles consistently.
Short verdict description
Under Short verdict description, optionally provide further details to explain and justify the Verdict title. Consider filling this field for potentially ambiguous titles that might benefit from further elaboration, such as 'Unsubstantiated' and 'Likely false'.
Verdict icon
Under Verdict icon, select an icon to display next to the Verdict title.
TIP: If your site plans to publish regular FactChecks, select one icon for each approved 'Verdict title' and use these icons consistently.
Verdict color
Select the color for the Verdict icon and Verdict title.
TIP: If your site plans to publish regular FactChecks, select one color for each approved 'Verdict title' and use these colors consistently.
Verdict introduction
The Verdict introduction acts as the 'General introduction' for the FactCheck. You can use this space to build on the title, offering readers more details about the topic of the story. The Verdict introduction won't be displayed on the FactCheck page, but it will be displayed in the A teaser is a preview or summary that appears when a story is shared or promoted on another page (similar to a rich link). For example, if a story is featured on a homepage widget, the widget displays a brief teaser to represent the story. on other pages.
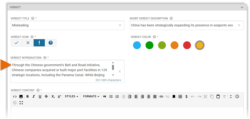
A well-crafted introduction sparks curiosity and encourages engagement with your content.
Verdict content
The Verdict content acts as the main content or body for the FactCheck page. Use this space to explain and justify the Verdict title in detail.
When creating Verdict content, you can use the same formatting options that are available for creating articles. For a detailed overview of the features in the Pangea text editor, visit the following article:

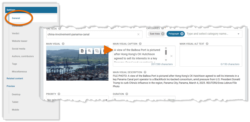
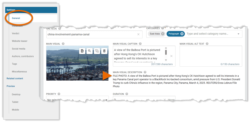
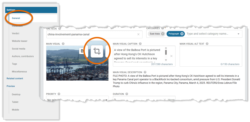
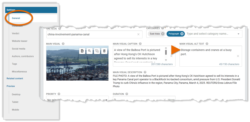
The Verdict content can include text and the following types of embedded content:
- Images: Images from the Pangea The Graphic Database (GDB) is the centralized image library in Pangea CMS. All images on Pangea websites come from the GDB. In Pangea CMS, Pangea users can browse the existing GDB and upload new images. Learn more. (GDB) or from supported external wire agencies
- External media: Supported external media items (including items from YouTube, Facebook, Instagram, Telegram and many more popular platforms).
- Direct embeds: Content items (such as videos and galleries) that are interactive on the page.
- See also links: Card-style links (similar to a social media previews) that direct readers to a separate content page.
For detailed instructions on how to insert embedded content, see the relevant article below:
Add authors
By consistently showing author names on content pages, you help to demonstrate authority and build trust with your audience.
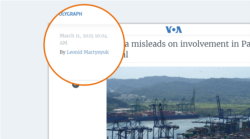
Select one or more author names via Authors, contributors > Authors.
Select names from the approved authors list for your site. You cannot use authors from other sites. To learn how to add a new name to the approved authors list, visit the following article:
Manage the status and publish
Every content page has an internal publication status in Pangea CMS. A page might move between the following statuses during the publication process:
- Draft: The page is not published. The content is still in progress and is not yet ready for editorial review.
- Edited: The page is not published. The first draft of the content is prepared and waiting for editorial review.
- Published: The page is published.
Change the status using the selector at the top of the edit page. For example, to change the status from Draft to Edited:
- Select Edited in the selector.
- Hit Save or Save & close.
The FactCheck is now saved in Pangea CMS with the Edited status.
When you are ready to publish the FactCheck, two options are available:
- Publish immediately.
- Schedule publication for a set time and date in the future.
For detailed information about the publication options, visit the following article:
Pangea offers the following special features for promoting published FactCheck content:
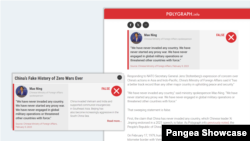
FactCheck widget
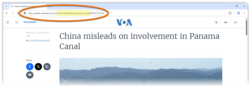
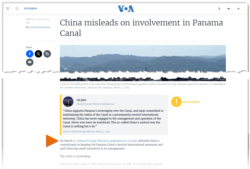
The FactCheck widget features a unique layout designed specifically to highlight FactCheck content. It offers a quick summary of the statement and verdict, enabling readers to grasp the key information at a glance without needing to open the full FactCheck page.

For detailed information, visit the following article:
FactCheck list Category-page layout
The FactCheck list Category-page layout is available for Content Categories. When this layout is enabled, the Category page features a list of all FactChecks from the Category, organized by date of publication. The teaser for each FactCheck offers a quick summary of the statement and verdict, similar to the FactCheck widget.
For detailed information, visit the following article:

