What's inside this article:
- Basic information
- Add categories for a content page
- Primary and secondary categories
- Category availability
- Category pages
- Category links
- Category layouts
- You Might Also Like
Basic information
User groups: Contributor_2020, Journalist_2020, Editor_2020, Master Editor_2020
About user groups
This article explains how to add categories for a content page. It also describes how categories affect the look and navigation of the published page.
What are categories?
Categories organize the content on your website by topic. For example, your website might have a 'Politics' category for all political content. Categories help visitors to navigate your website and browse content by topic.
Add categories for a content page
Every content page must have at least one category, but you can also add multiple categories. For example, an article about Romania's 2024 elections might have the categories 'Romania', 'Politics', and 'Elections'.
You can add categories for a content page in two ways:
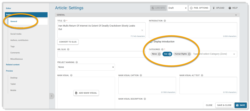
- Via General > Categories on the edit page for any item.
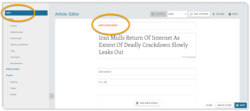
- Via Editor > Add Categories when creating text content.
When you add categories, the current primary category appears in a blue chip. To change the primary category, click the chip for a different category. Secondary categories appear in gray chips. To learn about the difference, see Primary and secondary categories.
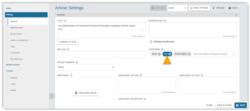
NOTE: If you do not see the category you want to add, see Category availability
Primary and secondary categories
When an item has multiple categories, one serves as the primary category and the others serve as secondary categories.
Both primary and secondary categories:
- Determine where the item is shared. For example, an item with multiple categories appears on the category page for every category.
- May appear as category links below the main content (on articles).
The primary category has additional functions. This category:
- Appears as a category link at the top of the page.
- Controls the layout of the page.
- Controls which You Might Also Like (YMAL) appears at the bottom of the page.
Category availability
Categories only support certain content types. When you add categories to a content page, only the supported categories appear in the list. For example, a category that only supports articles and features does not appear when you are creating a video.
You also only see categories that have one of the following statuses:
- Visible on site - enabled
- Visible in CMS only
Categories with other statuses cannot be assigned to content pages. For information about category statuses, see our separate guide: Creating a content category.
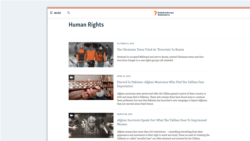
Category pages
Every public category has a category page, which is a landing page where visitors can browse content from that category. Category pages are automatically generated and display content by publication date, with the newest content first.
An item appears on the category page for every public category in the item settings. For details, see Add categories for a content page.
Category links
Every content page has at least one category link, which opens the category page. This helps visitors discover more related content.
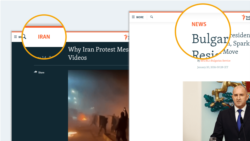
Category link at the top of the page
The primary category always appears at the top of the page. This applies for all content types.
Category links at the bottom of articles
On articles and other text content pages, primary and secondary categories appear below the main content. This only applies when the page has multiple categories.
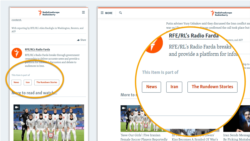
Category links appear below the main content on the following types of content pages:
- Article, Blog, Factcheck, Feature, Feature story, News, Transcript
Category layouts
Every public category has a layout, selected in the category settings:
| Layout | Applies on the category page | Applies on content pages |
|---|---|---|
| List with images | ✔ | ✘ |
| Blog with big images | ✔ | ✘ |
| Factcheck list | ✔ | ✘ |
| Latest news | ✔ | ✔ |
| Multimedia archive | ✔ | ✔ |
If the primary category uses the Latest news or Multimedia archive layout, the published page uses this layout. Other layouts apply only on the category page and do not influence the look of your content page.
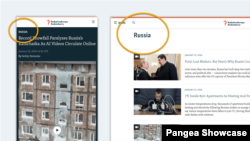
Latest news
A special layout for short, news-style content.
The category displays as a continuous stream rather than standalone pages. When a reader clicks a link to open a story, the full text appears at the top of the page. The reader can keep scrolling to browse more stories from the same category. For other stories, only the first paragraph is visible. The reader can expand any story to read the full text.
An example category using this layout is available here: Latest news

Multimedia archive
A special layout for podcasts and shows.
The category displays a header with clickable tabs on every page. This allows visitors to browse episodes and discover related material.
An example category using this layout is available here: Mockup TV

You Might Also Like
A 'You Might Also Like' (YMAL) is a collection of recommended content that appears below the main content on content pages.

Every content page automatically displays the YMAL that is assigned to its primary category. This means all pages with the same primary category display the same YMAL. If the primary category does not have a YMAL assigned, no YMAL appears on the page.
For more information about YMALs, see the following articles:

