What's inside this article:
- Basic information
- Upload photos
- Open the edit page and add general settings
- Add photos to your gallery
- Add captions and alt text
- Crop your photos
- Reorder your photos
- Add a sensitive content warning
- Choose a teaser image
- Request editorial review or publish
Basic information
User groups: Contributor_2020, Journalist_2020, Editor_2020, Master Editor_2020, Multimedia Upload_2020
About user groups
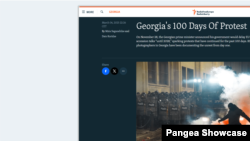
This article explains how to create and publish a new photo gallery in Pangea CMS.
A photo gallery is a collection of photos grouped around a specific event, location, or theme. Every photo gallery is published as a standalone content page.
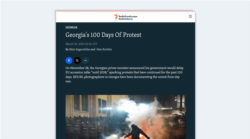
Embedded photo galleries
You can also embed a photo gallery on an article page. Readers can then browse the photos without leaving the article.
For instructions on embedding, see our Embedding Pangea content article.
Upload photos
Before you create a photo gallery, check that the photos you want to use are available in Pangea CMS. If not, you need to upload them first.
In Pangea CMS, you can browse and use the following types of images:
- Internal: Images that have already been uploaded by Pangea CMS users. If your images have already been uploaded, you do not need to upload them again.
- External: Images from external wire agencies. You can browse and upload external images from the photo gallery edit page in Pangea CMS. You do not need to upload them in advance.
For upload instructions, see our Uploading images article.
Open the edit page and add general settings
To start creating a photo gallery, go to Create > Multimedia > Photo gallery.
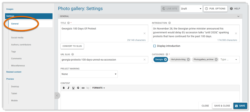
To add the general settings, select General in the left menu.
You cannot save the photo gallery until you add the following required settings:
- Title
- Categories
Find more details below:
Via General > Title, add the main title for the photo gallery.
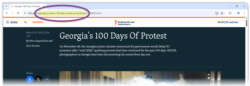
If you don't add additional titles, the main title appears:
- On the photo gallery page
- In teaser cards for the photo gallery on your website
- In teaser cards for the photo gallery on social media
You can create additional titles for different contexts. For information about the title options, see our Creating an article article.
To add one or more categories, go to General > Categories.
Categories organize your website content by topic. For example, your website might have a 'Politics' category for all political content. Every content page must have at least one category, but you can add multiple categories if needed.
For detailed information, see our Adding categories for a content page article.
The following settings are not required, but we recommend filling them for every content page:
- Introduction
- URL slug
Find more details below:
An introduction is important for:
- Attracting readers: Your introduction appears in teaser cards across your website and social media.
- Search engine optimization (SEO): Your introduction is used as the meta description, which helps search engines like Google to rank your page.
You can create up to three different introductions that appear in different contexts:
- Main introduction: Appears on the photo gallery page (optional), as well as in teaser cards and as the meta description.
- Teaser introduction: Replaces the main introduction in teaser cards and as the meta description.
- Social introduction: Replaces other introductions only in teaser cards on social media.
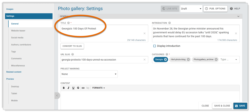
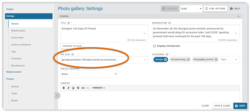
Create the main introduction via General > Introduction.
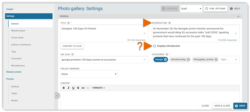
To display the introduction on the photo gallery page, select Display introduction.
NOTE: The Display introduction setting controls if the introduction appears on the photo gallery page. If this is unticked, your introduction may still appear in teaser cards and as the meta description.
For information about the introduction options, see our Creating an article article.
Create a URL slug via General > URL slug.
A URL slug is a string of human-readable text, separated by hyphens. A clear and concise URL slug helps to improve usability by telling you exactly where you will go after clicking a link. Human-readable slugs also help pages to rank more highly on search engine results pages.
When creating a URL slug, follow the guidelines below:
- Use the local language for your site.
- Use clear, human-readable language.
- Separate words with hyphens ('new-york' not 'newyork').
The content of the URL slug should be similar to the main title. However, it does not need to match the title exactly. To keep your slug concise:
- Include just words that are essential to convey meaning.
- Do not include words with no semantic value (such as 'a' and 'the').
- Do not include prepositions and linking words (such as 'and', 'of', and 'at').
For detailed information, see our Create a URL slug for a content page article.
Add photos to your gallery
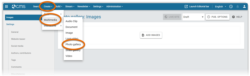
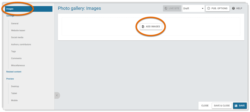
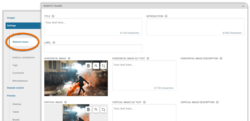
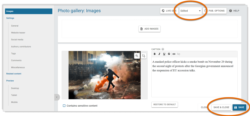
To add photos to your gallery, select Images in the left menu.
Select Add images to open the Search & attach dialog. On this dialog, find and attach every photo you want to include in the gallery.
For detailed information, see:
Search internal images
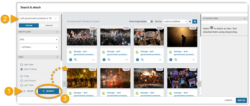
Select the Internal tab to search images that have been uploaded to Pangea CMS by users.
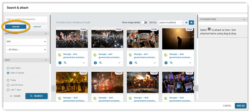
To run an image search:
- If needed, click Clear to remove existing search filters.
- Enter keywords and adjust the filters according to your needs.
- Click Search.
The results refresh to match your search criteria.
For detailed information, see our Running an image search article.
Search external images
Select the External tab to search images from external wire agencies.
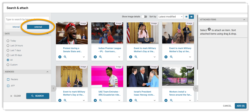
Pangea supports connections to the following agencies:
- AFP (Agence France-Presse)
- AP (Associated Press)
- Reuters
Availability varies, depending on your entity (RFE, VOA, or OCB). Different entities have different agency subscriptions. In Pangea CMS, you may have access to images from some or all of these agencies.
For detailed information, see our Running an image search article.
Attach and add images
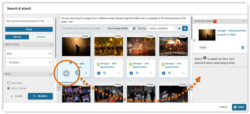
To attach an image, click the + Attach button.
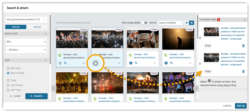
The image then appears on the Attached items list.
The following options are available for attached items:
- Reorder: Reorder items using drag and drop.
- Remove: Click Remove to remove an attached item.
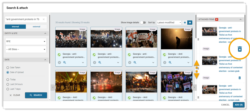
When you are ready, click Add. This action adds the photos to the photo gallery edit page in Pangea CMS.
Add captions and alt text
For detailed information, see:
Add captions
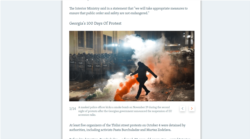
A caption is a short description shown beneath an image. In galleries, captions play a key role in storytelling. You can use this space to:
- Highlight the significance of a particular moment.
- Provide context to aid understanding.
- Identify individuals.
- Specify details like the location or date.
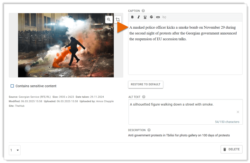
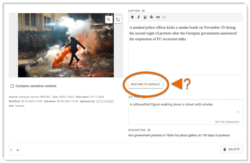
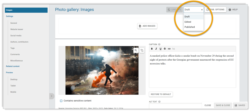
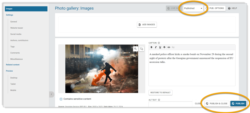
We recommend that you add a caption for every photo in the Caption box. The default English caption is automatically prefilled. You need to create a custom caption in your local language. Your custom caption only appears in the current gallery and does not overwrite the default caption.
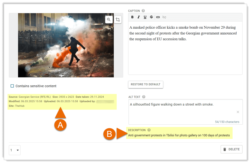
In addition to the default caption, the following information appears with each photo to help you create the caption:
- (A): Metadata: The metadata for the image.
- (B): Description: The internal image description.
Click Restore to default to show the default English caption in the Caption box.
NOTE: If you restore the default caption, any custom text in the Caption box is overwritten.
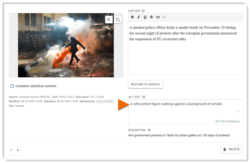
Add alt text
Alt text is a short and simple description of what you can see in an image. It is included in the HTML code for the image and is not normally displayed on the page itself. Alt text serves several important purposes:
- Accessibility: Screen readers read alt text aloud for users who cannot see the image, including those with visual impairments.
- Fallback: If the image fails to load, the alt text appears in its place.
- SEO: Search engines use alt text to understand the content of images. Effective alt text can improve the visibility of your images in search results.
For detailed information with examples, see our Creating alt text article.
In the Alt text box, you can add alt text for every photo. If you do not add alt text for a photo, the caption is used as the alt text.
Crop your photos
By default, the images on a photo gallery page appear full-size in their original Aspect ratio describes the proportional relationship between the width and height of an image (such as 16:9 or 3:4). Aspect ratio determines the shape of an image but not its size. Learn more.. For example, if the gallery includes a vertical image taken on a mobile, the full image is visible.
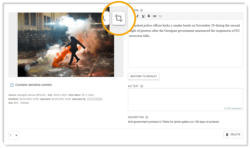
Manual cropping
To manually crop an image:
- Click the Crop image button.
- Move the box to select which part of the image to show.
Manual cropping maintains the standard 16:9 ratio.
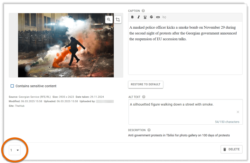
Reorder your photos
The order of your photos in Pangea CMS matches the order in the published gallery. To change the position of a photo, use the selector at the bottom of the photo settings. For example, selecting 1 places the photo first in the gallery.
Add a sensitive content warning
You can add a sensitive content warning to any photo. Add a warning if a photo may be upsetting or offensive for certain audiences. This applies for photos depicting:
- Violence or the aftermath of violent incidents
- Abuse or cruelty
- Disturbing or traumatic situations
- Sensitive cultural or religious content
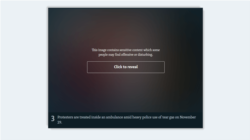
To add a warning, select Contains sensitive content.
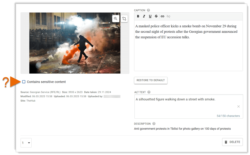
When Contains sensitive content is selected, the photo is covered with a short disclaimer on the public site. Visitors can choose whether to reveal the photo.
Limitations for the first image
If the first image has a sensitive content warning, you cannot save the gallery without a custom teaser image. This is because by default, the first image is used as the teaser image for the gallery. The teaser image appears on other pages where the warning cannot be shown.
The following options are available:
- Move the sensitive image so it is not the first image in the gallery.
- Add a custom teaser image that replaces the first image.
The teaser image appears in the teaser card for the photo gallery. The teaser card may appear on widgets, category pages, and external platforms where the gallery is shared.

By default, the first image in the gallery is used as the teaser image. If you want to use a different image, select Website teaser in the left menu. You can select the horizontal and vertical teaser images separately.
For detailed information about website teaser settings, see our Customizing the website teaser for a content page article.
Request editorial review or publish
Every content page has an internal publication status in Pangea CMS. Three statuses signal different stages of the publication process:
- Draft: The page is not published. The content is still in progress and is not yet ready for editorial review.
- Edited: The page is not published. The first draft of the content is prepared and waiting for editorial review.
- Published: The page is published.
After fully preparing the content and all relevant settings, you can take one of the following actions:
Request editorial review
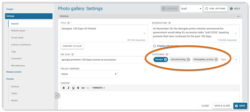
Request editorial review by changing the status of the gallery from Draft to Edited. This signals to editors that the content is ready for review.
Follow these steps:
- Select Edited in the selector.
- Click Save or Save & close.
The gallery status is now Edited.
Publish immediately
NOTE: Users in these Rights in Pangea CMS are regulated through user groups. Each user belongs to a specific group. This defines which areas of Pangea CMS they can access and what actions they can perform. Learn more. can publish a new photo gallery: Journalist_2020, Editor_2020, Master Editor_2020, Multimedia Upload_2020.
If you have authorization, you can publish immediately. When you publish a new content page, make sure the content is accurate and ready for your audience.
Follow these steps:
- Select Published in the selector.
- Click Publish or Publish & close.
The gallery is now live on your website. The publication date and time on the page are set automatically.
You can also schedule publication for a specific time and date in the future. For instructions, see our Publishing a new content page article.

