What's inside this article:
Basic information
This article explains how to create and update Sub navigations from Pangea CMS.
NOTE: Sub navigation is one of the core navigation elements on Pangea websites.
What is a Sub navigation?
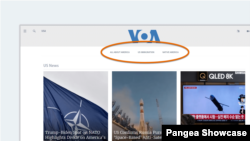
A Sub navigation is a horizontal collection of links, which appears directly below the site header. These prominent links provide quick access to key pages.
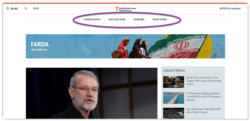
Your website might have multiple Sub navigations. Different Sub navigations can be displayed on different pages. An individual Sub navigation might be used on just one page or several pages.
Manage Sub navigations
To get started, go to Settings > Navigation menu > Sub navigation.
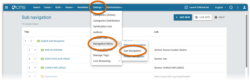
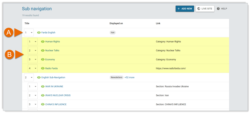
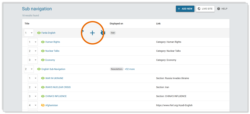
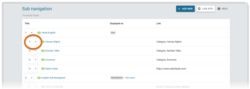
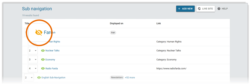
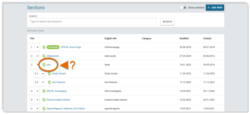
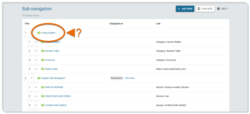
On the Sub navigation list in Pangea CMS, every Sub navigation is represented as follows:
- (A): Title (not visible on the public site)
- (B): Links
NOTE: After you update a Sub navigation, it might take up to 5 minutes before your updates are visible on the public site. A delay is possible because of the caching rules that are configured for Pangea websites. Learn more.
The following actions are available:
To create a new Sub navigation:
- Select Add new.
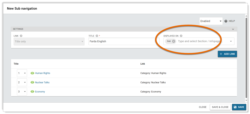
- Under Title, provide a title that will only be visible in Pangea CMS.
- Under Displayed on, optionally select pages (Sections / Infopages) where the Sub navigation will be displayed. If preferred, you can save the Sub navigation without adding any pages. You will be able to display the Sub navigation on pages later.
- Select + Add link.
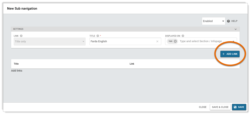
- Define the first link. Then, hit Add.
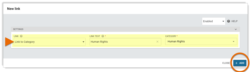
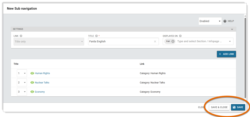
Repeat steps 4-5 for each link that you want to include in the Sub navigation. After adding all the links, hit Save & close.
The Sub navigation is saved in Pangea CMS. If you added pages, it is also visible on the public site. In Pangea CMS, the Sub navigation appears at the bottom of the list by default. You can change the order of the Sub navigations (see the section below for instructions).
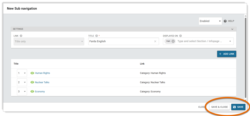
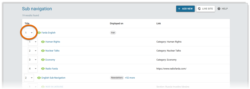
To add a new link to an existing Sub navigation:
- Hover over the title, and hit Add link.
- Define the link. Then, hit Save & close.
The link is added to the Sub navigation. It appears as the last link by default. You can change the order of the links within the Sub navigation (see the section below for instructions).
On the Sub navigation list in Pangea CMS, the order of the links within each Sub navigation reflects the order of the links on the public site.
To change the position of a link within a Sub navigation, use the selector that is next to the link title. For example, if you select 1, the link will be positioned first.
The order of the Sub navigations does not impact user experience on the public site. For convenience, you might position Sub navigations that are more regularly updated towards the top of the list. To change the position of a whole Sub navigation (including all links), use the selector next to the Sub navigation title.
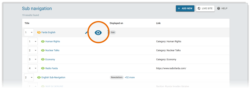
If you hide a Sub navigation, the Sub navigation is no longer visible on the public site. You can hide a Sub navigation temporarily, and if needed, start showing it again with just a single click.
To hide a Sub navigation:
- Hover over the title.
- Hit the Disable button.
The Disabled icon signals that the Sub navigation is hidden.
To show the Sub navigation again:
- Hover over the title.
- Hit the Enable button.
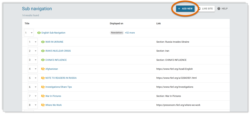
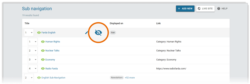
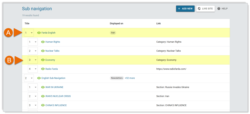
The following options are available:
- (A): To hide a whole Sub navigation (including all links), hit Disable next to the Sub navigation title.
- (B): To hide an individual link within a Sub navigation, hit Disable next to the link title.
If you remove a Sub navigation, the Sub navigation is no longer visible on the public site.
To remove a Sub navigation:
- Hover over the title.
- Hit the Remove button.

The following options are available:
- (A): To remove a whole Sub navigation (including all links), hit Remove next to the Sub navigation title.
- (B): To remove an individual link within a Sub navigation, hit Remove next to the link title.
Display a Sub navigation on pages
You can display a Sub navigation on one or more pages. The following types of pages can display Sub navigations:
- Section (including your homepage)
- Infopage
NOTE: Category pages do not display Sub navigations. If a Category and a Section are merged, the page cannot include a Sub navigation (even if the Section has an assigned Sub navigation). Learn more.
To display a Sub navigation on pages, use one of the methods below:
Page settings
To add a Sub navigation to a Section / Infopage page from the settings for the page:
- Go to Build, and select Sections or Infopages.
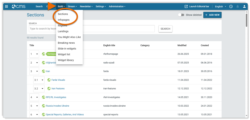
- Select the Section / Infopage where you want to display the Sub navigation.
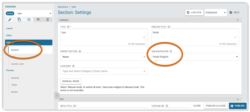
- Go to General > Sub navigation. Select the Sub navigation you want to display.
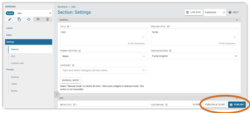
- Hit Publish or Publish & close.
The Sub navigation is displayed on the page.
If you select a Section that is merged with a Category, the Sub navigation will not be displayed on the page. Via General > Category, you can check if the Section is merged with a Category.
Sub navigation settings
To add a Sub navigation to pages from the Sub navigation settings:
- Go to Settings > Navigation menu > Sub navigation.
- Select the Sub navigation you want to display.
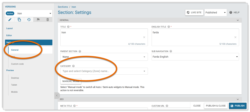
- Under Displayed on, select one or more pages.
- Hit Save or Save & close.
The Sub navigation is displayed on the page(s).
The following rules apply:
- If you select a page that already has a Sub navigation, the new Sub navigation will replace the old one.
- If you select a Section that is merged with a Category, the Sub navigation will not be displayed on the page.
Define links
A Sub navigation can contain links to the following types of pages on your website:
- Category pages
- Section pages
- Infopages
- Special pages (such as your Subscribe, Podcast, and TV Schedule pages)
A Sub navigation can also contain manual links. A manual link might point to any URL. For a manual link you can also choose how the link will open:
- Open in new tab: The link will open in a new tab. You might use this option for links to external sites.
- Open in same window: The link will open in the same tab. Always use this option for links to your own site.
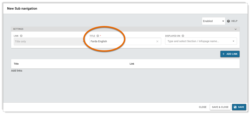
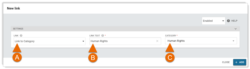
For each link, you need to add the following settings:
- (A): Link: The type of page you want to link to (Category, Section, Infopage, Special page, or Manual link).
- (B): Link text: The link text that is shown on the public site.
- (C): Category / Section / Infopage / Special page: The specific page you want to link to. Click inside the box and start typing to quickly find a page.
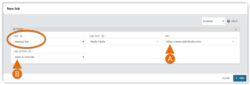
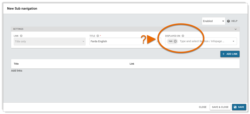
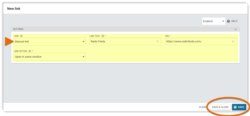
For a manual link, add the following settings:
- (A): URL: The URL for the link. For pages from your own site, you can enter a relative URL (such as /home). For pages from external sites, you need to enter the full URL (such as https://rferl.org).
- (B): Link option: How the link will open.