What's inside this article:
- Basic information
- Add the title
- Add text content
- Embed an image
- Manage the status
- Publish
- Embed the Backgrounder
Basic information
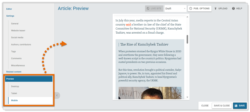
This article explains how to create and publish a new Backgrounder from Pangea CMS. To get started, go to Create > Text > Backgrounder.

This article also explains how to embed a Backgrounder on a page.
What is a Backgrounder?
A Backgrounder is a type of embedded content that can be added to text content pages. It appears as a distinct block with a gray background that is visually separated from the main body of the story. A Backgrounder always contains text and might also include an image and links to other pages. You might use Backgrounders in the following ways:
- Share non-essential background details that are relevant to the story. This might include historical context, profiles of key figures, side stories, and more.
- Highlight special investigations, projects, newsletters, social media accounts, and other related content.
NOTE: A Backgrounder is embedded content. It is not a standalone content page and it does not have a public URL.

Each published Backgrounder is a separate content item in Pangea CMS. This allows you to embed the same Backgrounder on multiple pages.
Add the title
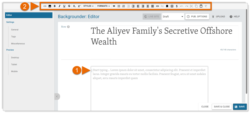
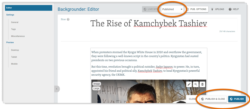
Add the title for the Backgrounder via Editor > Add title....

The title serves the following purposes:
- The title is displayed by default on the embedded Backgrounder. Editors can replace this default title with a custom one during the embedding process.
- The text is searchable in Pangea, helping other users to find and identify the Backgrounder.
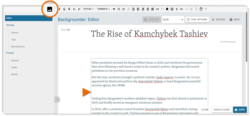
Add text content
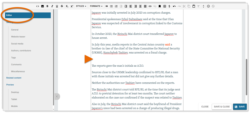
To start adding text, click inside the main box on the Editor subpage. While the box is active, the text editor bar is available. If you click elsewhere on the page, the bar disappears.
To learn about the features offered by the Pangea text editor, visit the following article:
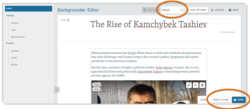
Embed an image
A Backgrounder might contain text and an image. If the image you want to use is saved on your device, you first need to manually upload it to the Pangea The Graphic Database (GDB) is the centralized image library in Pangea CMS. All images on Pangea websites come from the GDB. From Pangea CMS, users can browse the existing images or upload new ones. Learn more. (GDB).
If you do not have an image to upload, you might browse and use the following images:
- Internal: Images from the Pangea GDB. These images have been uploaded by other Pangea CMS users.
- External: Images from supported external wire agencies.
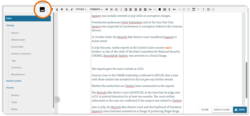
To get started embedding an image:
- Position the cursor where you want to insert the image.
- Hit the Insert embedded content button.
For detailed instructions, visit the following articles:
Manage the status
Every Backgrounder has an internal publication status in Pangea CMS. A Backgrounder might move between the following statuses during the publication process:
- Draft: The Backgrounder is not published. The content is still in progress and is not yet ready for editorial review.
- Edited: The Backgrounder is not published. The first draft of the content is prepared and waiting for editorial review.
- Published: The Backgrounder is published. It is visible on the public site if it has been manually embedded on at least one page.
Change the status using the selector at the top of the edit page. For example, to change the status from Draft to Edited:
- Select Edited in the selector.
- Hit Save or Save & close.
The Backgrounder is now saved in Pangea CMS with the Edited status.
Publish
A Backgrounder is visible on the public site if it has the Published status and it has been manually embedded on at least one page. You can embed a Backgrounder with any status (Draft, Edited, or Published). However, the Backgrounder will not be visible and will remain hidden until after it is published.
Two options are available for publishing a Backgrounder:
Publish immediately
To immediately publish a Backgrounder:
- Select Published in the status selector.
- Select Publish or Publish & close.
The Backgrounder is now published.
Schedule publication
You can schedule automatic publication for a specific time and date in the future. For detailed instructions, visit the following article:
Embed the Backgrounder
To embed a Backgrounder:
- Open the edit page for the story where you want to embed the Backgrounder.
- On the Editor subpage, click inside the main box and position the cursor where you want to insert the Backgrounder.
- Hit the Insert Embedded Content button in the text editor bar.
- Go to Single item > Content.
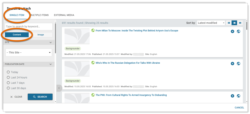
- Search for and select the Backgrounder you want to embed. For tips and information about how to use search, visit the following article:
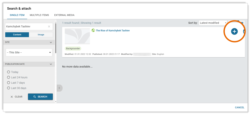
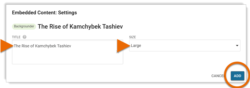
- If needed, change the title or the size of the Backgrounder. Then, hit Add.
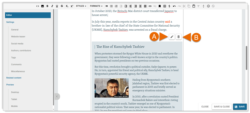
You see a placeholder representing the embedded Backgrounder in the text editor. The following buttons are available on the placeholder:
- (A): Edit: Change the title or size of the Backgrounder. To edit the content, you need to open the separate edit page for the Backgrounder in Pangea CMS.
- (B): Remove: Remove the Backgrounder from the page.
To check exactly how the Backgrounder will look on the published page, use the options under Preview in the left panel.