What's inside this article:
- Basic information
- Roles: Overview
- Statuses: Overview
- Save in draft
- Save as ready for review
- Immediately publish
- Schedule publication
- Stealth publish a video
- Update content after publication
Basic information
This article outlines the ideal editorial workflow for publishing a new content page from Pangea CMS. The specific workflow may vary from service to service, depending on your team’s size and organizational structure.
Roles: Overview
The publishing process for a new content page may involve colleagues in the following roles:
- Creator: A journalist or contributor who prepares the initial draft of the content.
- Reviewer: An editor who reviews the content before publication and is responsible for ensuring its quality and accuracy.
The 'creator' and 'reviewer' roles are not enforced through user permissions in Pangea CMS. These roles need to be assigned externally within teams.
User groups and permissions
User permissions in Pangea CMS are enforced through User groups. Every Pangea user is assigned to a User group. This controls which pages they can access and which actions they can perform. Users from the following User groups might be involved with publishing text content:
- Contributor_2020: Users with rights to edit but not publish content. Users from this group might act as 'creators'.
- Journalist_2020: Users with rights to edit and publish content. Users from this group might act as 'creators' or 'reviewers'.
- Editor_2020: Users with rights to edit and publish content. Users from this group might act as 'creators' or 'reviewers'.
For more information about User groups and permissions, visit the following article:
Statuses: Overview
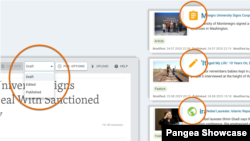
Every content page has an internal publication status in Pangea CMS. A page might move between the following statuses during the publication process:
- Draft: The page is not published. The content is still in progress and is not yet ready for editorial review.
- Edited: The page is not published. The first draft of the content is prepared and waiting for editorial review.
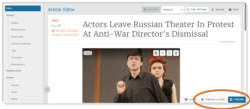
- Published: The page is published.
The current status for each story is displayed on the main Search page.
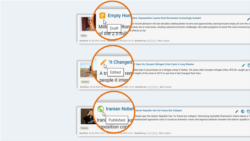
On the main Search page, you can filter the search results by publication status. For example, a reviewer might want to find all content with the Edited status. For more information, visit the following article:
Save in draft
You can save a content page in draft while the content is still in progress. This action is normally performed by a creator.
TIP: Save your work frequently to prevent losing changes in case of an unexpected issue.
To save in draft:
- Select Draft in the status selector.

- Hit Save or Save & close.

The content is now saved in Pangea CMS with the Draft status.
Save as ready for review
When the first draft is prepared, the creator might mark that the content is ready for editorial review.
Follow these steps:
- Select Edited in the status selector.
- Hit Save or Save & close.
The content is now saved in Pangea CMS with the Edited status. This signals that the content requires attention from a reviewer.
Immediately publish
When a content page has passed editorial review, it is ready to publish. This action is normally performed by a reviewer.
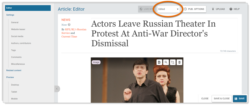
To immediately publish a content page:
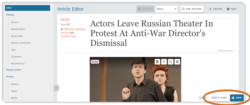
- Select Published in the status selector.

- Hit Publish or Publish & close.
The content page is now published. The publication date and time on the published page are set automatically to the moment of publication.

Schedule publication
You can schedule automated publication for a specific date and time in the future. This action is normally performed by an reviewer.
Follow these steps:
- Select Published in the status selector.
- Select Pub. options.

- Select Schedule publication.

- Under Publication date & time, select the date and time when you want the content to be published. Enter the date and time manually or click the calendar icon to use the date and time picker.

- Select Apply.

- Select Schedule or Schedule & close.

Publication is now scheduled for the specific date and time. The content will be automatically published at this moment.
Before it is published, the content has the Scheduled status in Pangea CMS. For instructions on how to search for scheduled content, visit the following article:
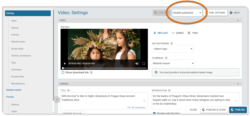
Stealth publish a video
The special Stealth published status is available only for videos. A stealth video does not have a public URL and can be shared only as embedded content. For detailed information, visit the alternative article below:
Update content after publication
You can update a content page after publication. Different rules apply for updating different types of content. For details, go to the relevant section below (according to the type of content):
Article-based content
The information below applies for the following types of article-based content pages:
- Article | Blog | Feature | Feature story | News | Transcript
When you update an article-based content page, you can save changes internally without impacting the published version. The changes can then go through editorial review before publication (similar to publishing a new content page). For detailed information, visit the alternative article below:
Other content
If you need to update a content page that is not article-based, you cannot save your changes internally. You need to directly publish your changes. Please be aware that if you change the publication status from Published to Draft or Edited, the page will be unpublished.

