What's inside this article:
- Basic information
- Add General settings
- Set when the Live blog will be active
- Add the first post
- Publish a Live blog
- Collaborate with colleagues
- Add a new post
- Feature a post
- Set up highlights
- Close the Live blog
Basic information
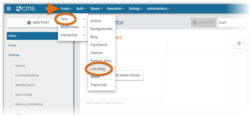
This article explains how to create and update a Live blog page from Pangea CMS. To get started, go to Create > Text > Live blog.
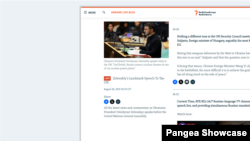
What is a Live blog?
A Live blog is a type of content page designed for real-time coverage of developing events. It allows you to publish a series of updates or posts in a continuously updated live feed.
Add General settings
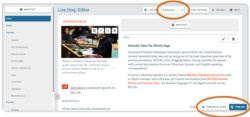
On the Editor subpage, add the following General settings for the Live blog:
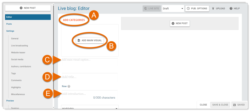
- (A): Categories (required): Select one or more Categories. If you select multiple Categories, set one Primary Category.
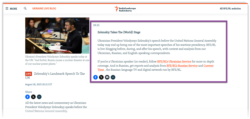
- (B): Main visual: Select a Main visual, which will be displayed on the published Live blog page and in the default teaser for the Live blog.
- (C): Main visual caption: Provide a caption for the Main visual in the local language for your site. An effective caption provides context for the visual and explains its relevance to the story.
- (D): Title (required): Provide the General title for the Live blog.
- (E): Introduction: Provide the General introduction for the Live blog. The introduction builds on the title by offering readers more details about the topic of the Live blog. Via General > Display introduction, you can control whether the introduction will be displayed on the published Live blog page.
For detailed information about the General settings, visit our guide on article creation:
Set when the Live blog will be active
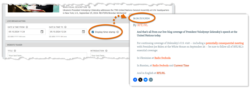
It's important to define the time period when the Live blog will be active. This is the period when you expect new posts to be published. The following behavior applies only while a Live blog is active:
- The LIVE badge is displayed on the Live blog page and on widgets where the blog is promoted.
- Readers on the Live blog page will see the New posts notification when a new post is published. They can click the notification to refresh the page and go straight to the latest post.
To get started, select Live broadcasting in the left panel.
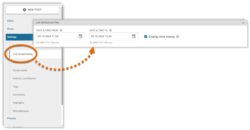
The following settings allow you to define when the Live blog will be active:
- Date & time from: The start time for the Live blog. The default start time is the time when the Live blog was created in Pangea.
- Date & time to: The end time for the Live blog. The default end time is one hour after the default start time. If you don't know exactly when the live reporting will finish, it's best to overestimate the amount of time you will need. If the blog ends earlier, you will be able to change the end time later.
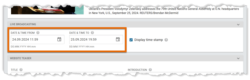
Enter the times according to the local time for your site (not the local time on your device). You can click the Time and date button in the primary navigation to check the local time for your site.
If you tick Display time stamp, the date and time of publication will be displayed with every post.
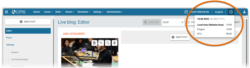
Add the first post
You might add the first post before the Live blog is published. This ensures that content will be available on the page as soon as it is published. The first post introduces the topic of the Live blog and lets visitors know what the expect.
You cannot add the first post until you complete both actions below:
- Add all the required settings. (For a Live blog, this means adding a Title and Categories.)
- Save the Live blog internally in Pangea CMS.
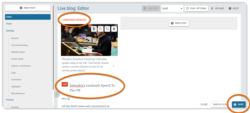
To add a post, hit the + New post button.
Publish a Live blog
To publish the Live blog:
- Select Published in the status selector.
- Select Publish or Publish & close.
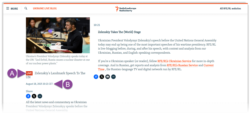
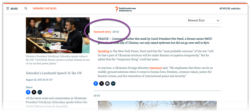
The Live blog is now published. The following rules apply:
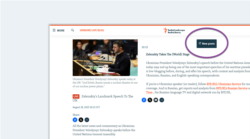
- (A): The LIVE badge might be immediately visible, depending on the start and end times that are set in the Live broadcasting settings.
- (B): The publication date and time are set automatically to the moment of publication.
To learn about the various publication options in Pangea CMS (including scheduled publication), visit the following article:
Collaborate with colleagues
Multiple colleagues might collaborate together on the same Live blog. To support collaboration, the following rules apply:
Central Live blog edit
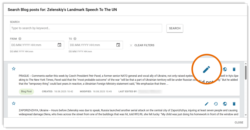
Only one user at a time can work on the central edit page for a Live blog. While a user has the edit page open, it is locked for others. During this time, the Live blog will display an Unlock button on the main Search page. Hovering over this button will show the name of the user currently editing the page.
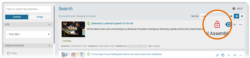
When the edit page is locked, it is still possible for another user to create a new post or manage existing posts. Follow the relevant step from the main Search page:
- Hit Add new post to create a new post.

- Hit See posts to open the list of posts.

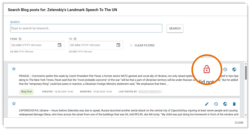
Posts edit
Multiple users can edit different posts at the same time. However, only one user can edit a specific post at a time. While a user is editing a post, it is locked for others. During this time, the post will display an Unlock button in the list of posts. Hovering over this button will show the name of the user currently editing the post.
For information on how to manage locked content in Pangea CMS (including how to unlock), visit the following article:
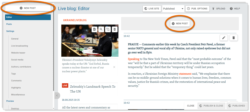
Add a new post
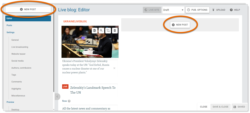
To add a new post to a Live blog, use one of the methods below:
- On the main Search page, select + Add new post.
- Open the Live blog edit page and select + New post.
The following settings are available for a new Blog post:
- Blog post title: Optionally enter a title to show at the top of post. This title may also be shown in highlights (if no Highlight title is set).
- Highlight title: Optionally enter a title to show only in highlights.
- Author: Optionally select one or more authors. The name(s) will be displayed at the top of the post. You can only select names from the approved list of authors for your site. You cannot use authors from other sites.
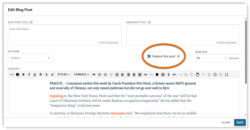
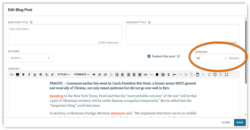
- Feature this post: Optionally feature the post.
- Duration: If the post is featured, set for how long it will remain featured.
The only required field is Content. When creating the content for a Blog post, you can use the same formatting options that are available for creating articles. For a detailed overview of the features in the Pangea text editor, visit the following article:
Feature a post
You can pin a post to the top of a Live blog for a set number of minutes. While a post is featured, all new posts will appear below it.
The following actions are available:
Quickly feature a post
To quickly feature a post:
- Hit See posts on the main Search page.
- Click the star next to the post you want to feature. The star turns blue.
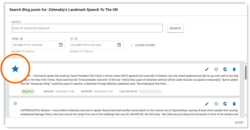
The post is now featured. By default, it will remain featured for 30 minutes (unless a different default duration is set for your site). To stop featuring the post before this time, click the star so that it turns white again.
NOTE: Contact Pangea Customer Care if you want to change the default duration for featured Blog posts on your site.
Set the duration
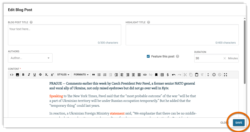
To feature a post and manually set for how long the post will remain featured:
- Hit See posts on the main Search page.
- Hit the Edit button next to the post you want to feature.
- Tick Feature this post.
- Next to Duration, enter for how long the post will remain featured (in minutes).
- Hit Save.
The post is now featured.
NOTE: A Live blog can have one featured post at a time. If you feature a new post while another post is already featured, the new post will replace the old one. The old post will move down the page to its normal position (according to the time of publication).
Set up highlights
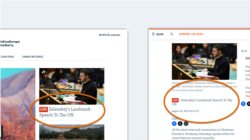
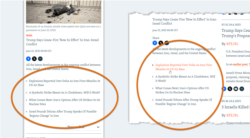
Highlights provide an at-a-glance summary of key Live blog developments with links to selected posts. This allows visitors to quickly grasp the subject matter as soon as they land on the page. Highlights are displayed at the side of the page on desktop or above the most recent post on mobile and tablet.
The following options are available for setting up highlights:
- Automated: Highlight the most recent posts that have a title. As new posts are added to the Live blog, the highlights will update automatically.
- Manual: Manually select which posts to highlight. Each highlight is manually selected by an editor in Pangea CMS.
In highlights, just a title for each post is shown. For this reason, only posts with titles can be included in highlights.

If you want to highlight a post, fill at least one of the following fields on the edit page for the post:
- Blog post title: Shown directly above the post. If no Highlight title is set, this title is also shown in highlights.
- Highlight title: Shown only in highlights.

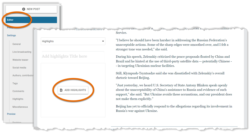
To add highlights, scroll to Editor > Highlights. Ensure Highlights is selected in the selector.

In the Add highlights title here box, optionally enter a title that will be displayed above the highlights on the public site. If you do not enter a title, no title will be displayed above the highlights.
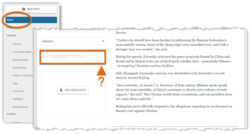
When you are ready, hit Add highlights.
For detailed information about how to set up highlights, visit the following article:
Close the Live blog
A Live blog page stays published and is accessible on the public site, even when it is no longer active. After the Live blog ends, you might perform the following actions:
- Add a final post, telling readers that the Live blog is no longer being updated.
- Go to the Live broadcasting settings, and ensure that the Live blog is no longer active by changing the end time if needed.
- If highlights are shown on the Live blog page, replace the highlights with a manual summary. For instructions, visit the alternative article below:

