What's inside this article:
- Basic information
- Add titles to posts
- Get started with highlights
- Set up manual highlights
- Set up automated highlights
- Publish or save highlights
- Replace highlights with a summary
- Change the maximum number of highlights
Basic information
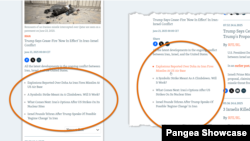
Highlights provide an at-a-glance summary of key Live blog developments with links to selected posts. This allows visitors to quickly grasp the subject matter as soon as they land on the page. Highlights are displayed at the side of the page on desktop or above the most recent post on mobile and tablet.
The following options are available for setting up highlights:
- Automated: Highlight the most recent posts that have a title. As new posts are added to the Live blog, the highlights will update automatically.
- Manual: Manually select which posts to highlight. Each highlight is manually selected by an editor in Pangea CMS.
NOTE: The maximum number of highlights is five, unless a different maximum number is configured for your site.
This article explains how to add highlights to a Live blog page. For general information about the Live blog content type, visit the alternative article below:
Add titles to posts
In highlights, just a title for each post is shown. For this reason, only posts with titles can be included in highlights.

If you want to highlight a post, fill at least one of the following fields on the edit page for the post:
- Blog post title: Shown directly above the post. If no Highlight title is set, this title is also shown in highlights.
- Highlight title: Shown only in highlights.

For more information about how to create a Live blog post, visit the alternative article below:
Get started with highlights
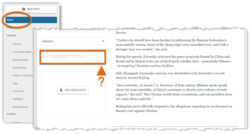
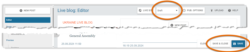
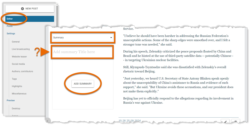
To add highlights, scroll to Editor > Highlights. Ensure Highlights is selected in the drop-down menu.

In the Add highlights title here box, optionally enter a title that will be displayed above the highlights on the public site. If you do not enter a title, no title will be displayed above the highlights.
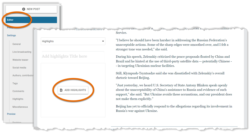
When you are ready, hit Add highlights.
The following options are available:
Set up manual highlights
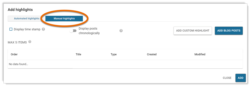
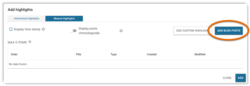
To set up manual highlights, select the Manual highlights tab.
The following actions are available:
To add posts to highlights, select Add blog posts. This button is not clickable if you have already added the maximum number of highlights.
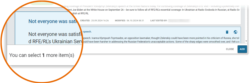
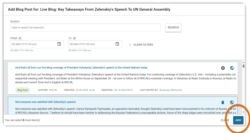
Search for and select every post you want to highlight. You can only select a post that has a title. If a post does not have a title, you see the message:
- No Title added to this post

You cannot select more than the maximum number of posts. The number you can select is indicated in the dialog footer.
After selecting every post you want to highlight, select Add to confirm the action. The change is not yet published or saved.
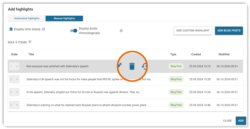
If you tick the box next to Display time stamp, the time and date of publication will be displayed with each individual highlight.

When Manual highlights is selected, you can create a custom highlight. A custom highlight is not linked to a specific Blog post.
To add a custom highlight, select Add custom highlight. This button is not clickable if you have already added the maximum number of highlights.

You can add and format custom text using the basic text editor. When you are satisfied, hit Add.
Enable Display posts chronologically to automatically display the highlights in order of publication. Alternatively, use the drop-down menu next to each highlight to manually set the position. For example, if you select 1, the highlight will be positioned first.
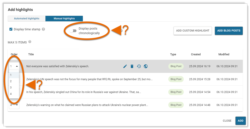
To remove a highlight, hover over the panel and hit the Remove button.
Set up automated highlights
To set up automated highlights, select the Automated highlights tab.
After you perform this action, the five most recent posts with a title are automatically selected (unless a different maximum number is configured for your site).
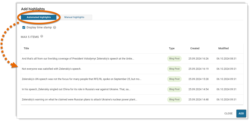
If you tick the box next to Display time stamp, the time and date of publication will be displayed with each individual highlight.
Publish or save highlights
Click Add on the Add highlights dialog to confirm your selection.
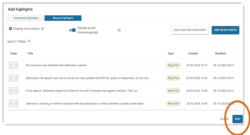
If the Live blog has the Published status, the highlights will not be published until after you hit the main Publish or Publish & close button.

If the Live blog has the Draft status, the highlights will not be saved in Pangea CMS until after you hit the main Save or Save & close button.
Replace highlights with a summary
When the live reporting has concluded, you can show a manual summary instead of highlights. A summary outlines the key takeaways for visitors who are coming to the page after the Live blog has ended.
To replace highlights with a summary:
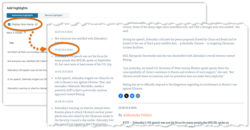
- Scroll to Editor > Highlights.
- Select Summary in the drop-down menu.
- Optionally enter a title to display above the summary.
- Select Add summary.
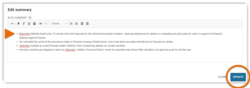
You can add and format the summary text using the basic text editor. When you are satisfied, hit Update.
The summary will not be published until you hit Publish or Publish & close.
Change the maximum number of highlights
By default, the maximum number of highlights that can be shown at one time is five. We can change the maximum number for individual services on request. To change your maximum number, contact Pangea Customer Care.

