What's inside this article:
- Basic information
- Upload a video file
- Add general settings
- Add authors
- Trim the video
- Set the video thumbnail
- Show text below the player
- Request editorial review or publish
Basic information
User groups: Contributor_2020, Journalist_2020, Editor_2020, Master Editor_2020, Multimedia Upload_2020
About user groups
This article explains how to upload a video file to Pangea CMS, configure the key video settings, and publish your video.
Publication options
Pangea CMS offers two publication options for on-demand videos:
- Standard: The video is published as a content page and is indexed by search engines. You can also embed the video as supporting content on other pages.
- Stealth: The video does not have a content page and is not indexed by search engines. You can embed the video as supporting content on other pages. Use stealth publishing for shorter videos that support storytelling but do not need a standalone page.
This article covers standard publishing. For information about stealth publishing, see the following article:
Upload a video file
To upload a video to Pangea CMS, go to Create > Multimedia > Video.
For detailed upload instructions, see our Uploading video files article.
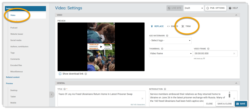
Open the edit page for the video
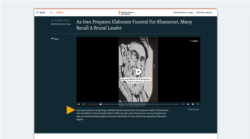
As soon as the upload starts, your video is saved in Pangea CMS. The default title is the name of the video file.
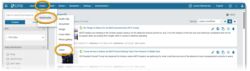
You can open the edit page using one of these methods:
- (A): Click the Edit button in the upload manager.
- (B): Find the video on the Search page and click the title. For instructions on searching for content, see our Running a content search article.
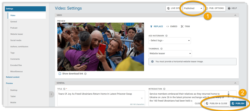
The remaining sections in this article cover the key options on the video edit page.
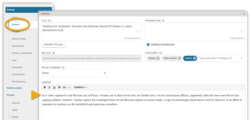
Add general settings
You cannot save a new video in Pangea CMS until you add the following required settings:
- Title
- Categories
Find more details below:
The following settings are not required, but we recommend completing them for every content page:
- Introduction
- URL slug
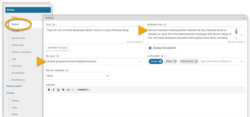
Find more details below:
Create a URL slug via General > URL slug.
A URL slug is a string of human-readable text, separated by hyphens. A clear and concise URL slug helps to improve usability by telling users where they will go after clicking a link. Human-readable slugs also help pages to rank more highly on search engine results pages.
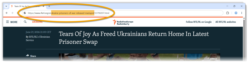
When creating a URL slug, follow the guidelines below:
- Use the local language for your site.
- Use clear, human-readable language.
- Separate words with hyphens ('new-york' not 'newyork').
The content of the URL slug should be similar to the main title. However, it does not need to match the title exactly. To keep your slug concise:
- Include only words that are essential to convey meaning.
- Do not include words with no semantic value (such as 'a' and 'the').
- Do not include prepositions and linking words (such as 'and', 'of', and 'at').
For detailed information, see the following article:
Add authors
By consistently assigning author names to content pages, you help to demonstrate authority and build trust with your audience. For a video, the authors may include the journalist who captured the footage and the editor who produced the content. The assiged author names appear at the top of the published video page.
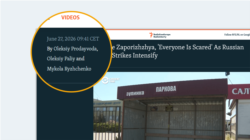
To select one or more authors, go to Authors, contributors > Authors.
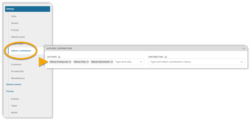
You see the list of approved authors for your site. You cannot use authors from other sites. To learn how to add a new author to the list, see the following article:
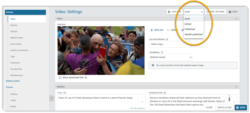
Trim the video
The trimming tool in Pangea CMS lets you remove unwanted content from the start and end of your video.
NOTE: The trimming tool is not available until Pangea CMS has fully processed the video file.
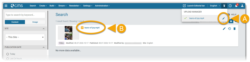
To trim the video, click the Trim button.
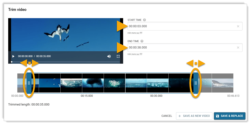
On the Trim video dialog, set the new start and end times using one of these methods:
- Drag the trim handles along the timeline. When you move the handles, the new start and end times appear automatically under Start time and End time.
- Under Start time and End time, manually enter the new start and end times.
When you confirm the trim action, Pangea CMS removes all content before the new start time and after the new end time.
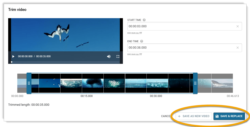
To confirm the trim action, choose your preferred option:
- Save & replace: Replace the original video. Only one video is saved.
- Save as new video: Save the trimmed video as a new video. Both videos are saved.
You can find more details below:
Replace the original video
After setting the new start and end times, click Save & replace to replace the original video with the new trimmed video.
Pangea CMS immediately starts processing the new trimmed video. For published videos, the original stays published until Pangea CMS has fully processed the new trimmed video.
IMPORTANT: The content you remove from the start and end of the video cannot be restored.
Save the trimmed video as a new video
After setting the new start and end times, click Save as new video to save the trimmed video as a new video in Pangea CMS.
The edit page for the new trimmed video immediately opens in a new tab. The edit page for the original video remains open in the previous tab.
The new trimmed video:
- Is not published. (It has the Draft status.)
- Has the same title as the original video with '[TRIMMED] -' at the start.
- Keeps most other settings from the original video. Multimedia distribution settings are the only exception. These settings do not transfer to the trimmed video.
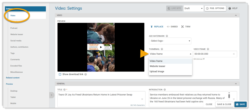
Set the video thumbnail
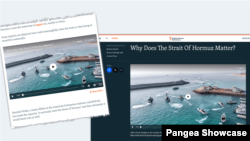
A thumbnail (sometimes called a 'poster' or 'player image') is a static image that appears in the video player before playback begins. A strong thumbnail makes your video more noticeable, increases engagement, and gives viewers a quick visual preview of what to expect.

Set the thumbnail using one of these methods:
- Video frame: Use a frame from the video file.
- Website teaser: Use the teaser image for the video.
- Upload image: Upload a custom image.
To choose your preferred option, go to Video > Thumbnail.
For detailed information, see the following article:
Show text below the player
You can show text below the player on the public video page. Use this text to help viewers understand the video by providing context and background information.
You can show one or both of the following texts:
Show the main introduction below the player
The main introduction can include up to 300 characters of plain text. It cannot include formatting or links.
NOTE: The main introduction may also appear in other places. For more information, go to the Add general settings section.
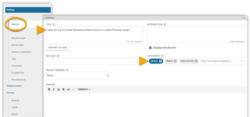
To show the main introduction below the player:
- Go to General > Introduction.
- Enter the main introduction for the video.
- Tick Display introduction.

Create content to show below the player
The content has no character limit and can include basic formatting and links.
To create content to show below the player:
- Go to General > Content.
- Enter the text. You can also add formatting and links.
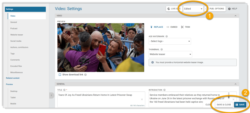
Request editorial review or publish
Every video has an internal publication status in Pangea CMS. These statuses signal different stages of the publication process:
- Draft: The video is not published. It is not yet ready for editorial review.
- Edited: The video is not published. It is prepared and waiting for editorial review.
- Published: The video is published. It has a content page and is indexed by search engines.
- Stealth published: The video is published and is available to embed as supporting content. It does not have a content page and is not indexed by search engines.
NOTE: For information about stealth publishing, see our Stealth publishing a content item article.
After fully preparing the content and all relevant settings, you can take one of the following actions:
Request editorial review
Request editorial review by changing the status of the video from Draft to Edited. This signals to editors that the video is ready for review.
Follow these steps:
- Select Edited in the selector.
- Click Save or Save & close.
The video status is now saved with the Edited status.
Publish immediately
NOTE: Users in these Rights in Pangea CMS are regulated through user groups. Each user belongs to a specific group. This defines which areas of Pangea CMS they can access and what actions they can perform. Learn more. can publish a new video: Journalist_2020, Editor_2020, Master Editor_2020, Multimedia Upload_2020.
If you have authorization, you can publish immediately. Before you publish, make sure the video is ready for your audience.
Follow these steps:
- Select Published or Stealth published in the selector.
- Click Publish or Publish & close.
The video is now published. If the video has a content page, the publication date and time on the page are set automatically.
You can also schedule publication for a specific date and time in the future. For instructions, see the following article:

